
Nov 15
/
Dennis Hartlieb
Incisal Edge Chipping - NCIL

Incisal
Edge Chipping – Look Out For The NCIL!
How many patients did
you see last week in your hygiene schedule that had small, minor chips on their
anterior teeth? Maybe just on the
maxillary teeth, maybe on the lower teeth, or perhaps, both the uppers and the lowers; I’m guessing more than one or two
patients. If your practice is like mine,
these patients are a regular occurrence. Some of the patients are aware of the chipping. Other patients are
completely unaware. As dentists, we tend
to shy away from treating these chips because our experience is that if we do
minimally invasive bonding techniques, the composite will break, with both the
patient and dentist becoming frustrated. In today’s blog, I want to share with you a technique that I use
commonly in my practice to restore these nuisance chips at the incisal edges of
the maxillary and mandibular incisors, in an efficient, and predictable manner.
Our conversations with patients typically reference the visible chipping from the facial view, very often the teeth can look similar to these:
Our conversations with patients typically reference the visible chipping from the facial view, very often the teeth can look similar to these:
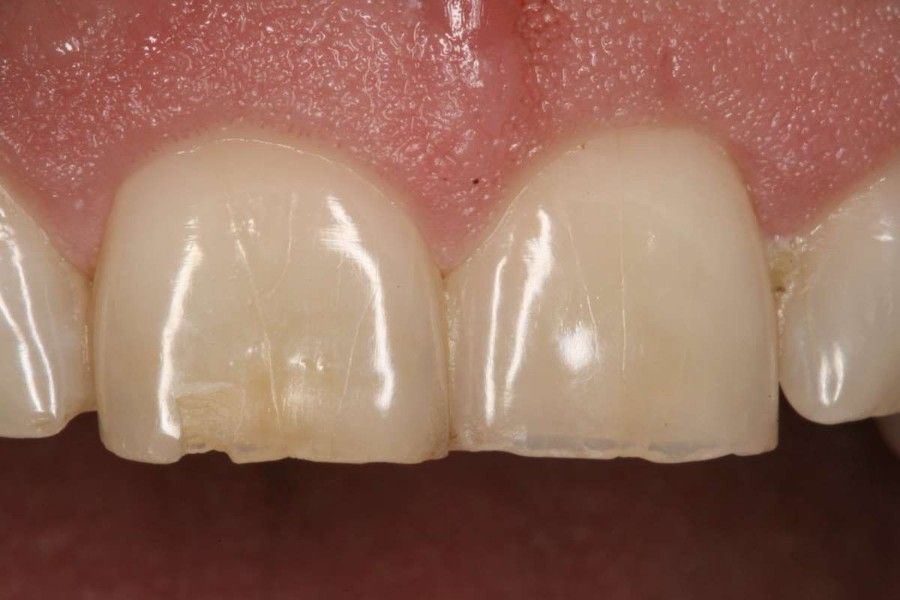
It was actually the incisal facial chip on tooth #8 that brought the patient to the practice:

When you see these incisal chips,
especially on the maxillary anterior teeth, I want you to pull out your 5c
mirror and look at the incisal edges of the teeth, from a lingual view. This is the view that we need to use to help
our patients understand why their teeth are chipping. This patient’s teeth looked like this:
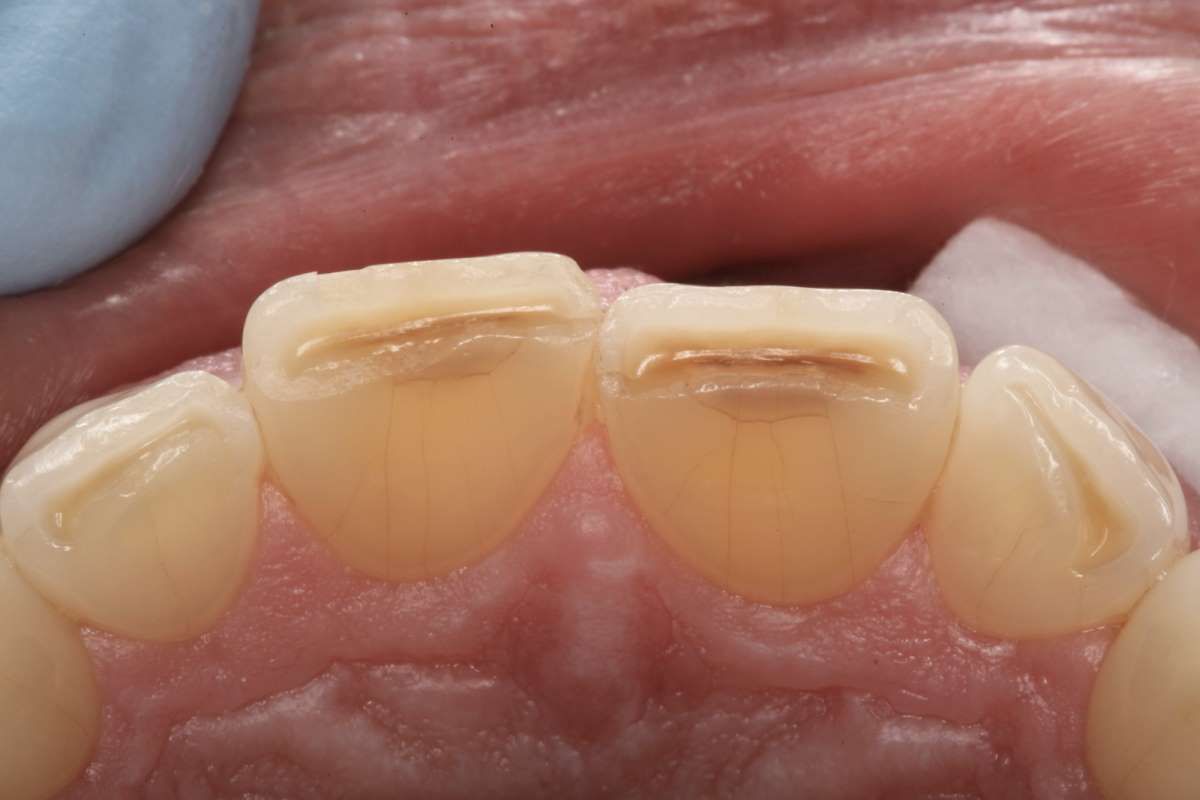
I refer to the
ditches along the incisal edges as NCIL’s, or Non-Carious Incisal Lesions.
It seems that these lesions are epidemic in
our practice, both on the maxillary and mandibular incisors.
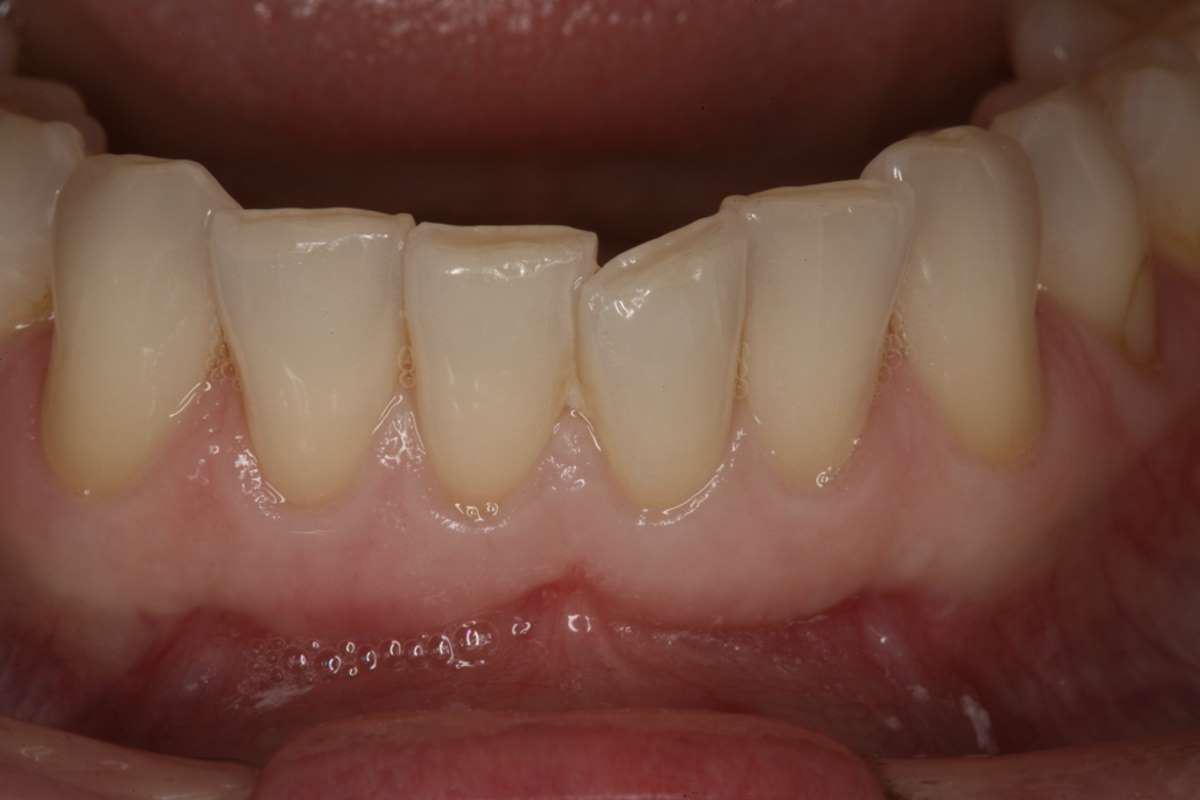
Here’s a case from a different patient with lower anterior NCIL’s:
Here’s a case from a different patient with lower anterior NCIL’s:
Let’s talk about the
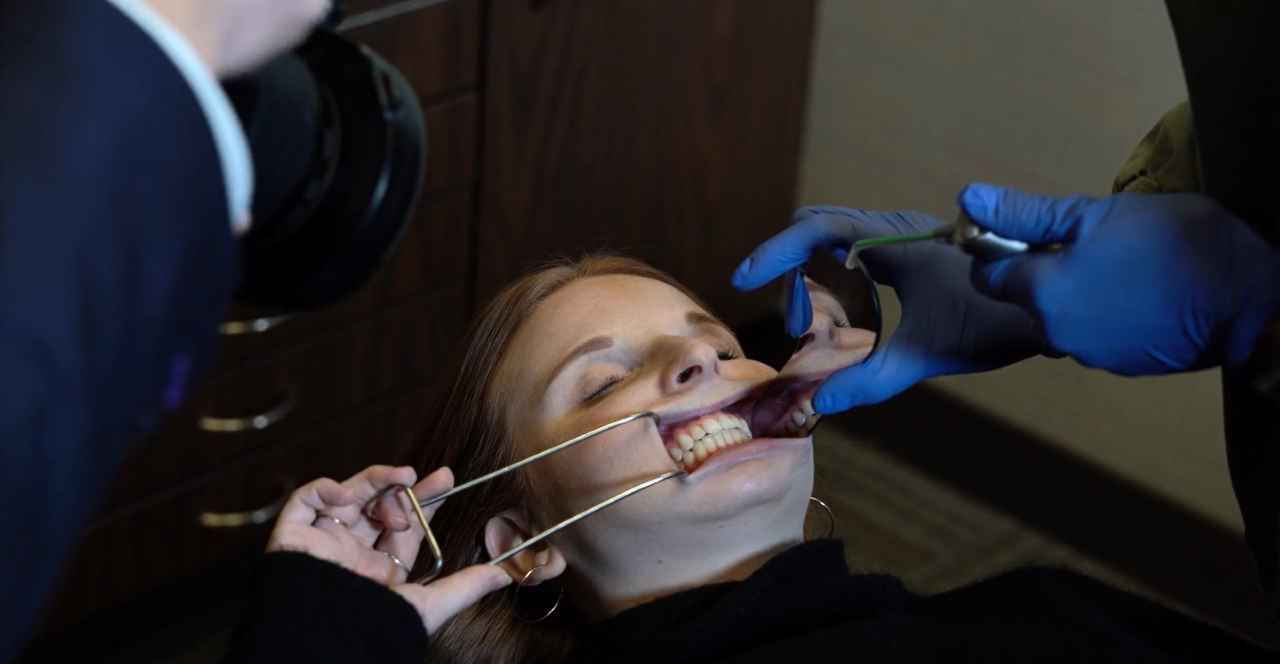
NCIL – the causes, and the treatment solutions for our patients. I believe that photographs, either with an
intraoral camera or with a 35 mm camera and photographic mirrors, are essential
to educate our patients. Additionally, photographs also influence our patients
towards treatment. We use DigiDoc in our
practice for our intraoral camera, but there are many other excellent options
available today. For 35 mm photography, I use a Canon 5D body with a 100 mm
macro-lens with a ring flash attachment for these types of images. If you’d like more information on shooting
high quality photographs on your
patients, check out our course – Digital Dental Photography on our website.
Related Course: Digital Dental Photography
These photographs are an essential first step to helping your patients understand what is happening to their teeth. In my experience, rarely do patients have sensitivity with these lesions. What I have observed in practice is that patients will comment on three issues when these NCIL’s have progressed.
1. Visible chipping of the edges or facial incisal surfaces of the maxillary teeth.
2. Chipping of the lingual incisal wall of the mandibular anterior teeth.
3. Severe translucency or shine thru of the maxillary central or lateral incisors.
Occasionally, I will hear a complaint from a patient that
they get small seeds stuck in the grooves of the maxillary anteriors, but that
has only happened a couple of times that I can recall. So essentially, the patient reports most
often when there has been breakage of the tooth, or severe shine thru of the
maxillary anteriors. Again, rarely, if
ever, will a patient report pain or sensitivity related to the NCIL.
While I think it is important not to over-educate (i.e. overwhelm with information) our patients, I have found it critical to help patients understand what is happening, before we talk about possible solutions. I want the patient to understand that they have an issue or issues that need to be addressed before we even start talking about the possible solution(s). My conversations with the patient, before I even look in the mouth, will typically go something like this:
Dennis Hartlieb:
Boy, it’s really interesting to me that your front teeth are chipping. Is that
something new that is going on, or has it been happening for a while now?
Patient: It's funny you say that. It just happened last
weekend. I bit on a fork when I was
eating breakfast, and the tooth just chipped!
Dennis Hartlieb: Wow, that’s crazy! It broke on a fork! You must have really
bitten hard on the fork?
Patient: No,
I wasn’t biting hard at all which is what is so weird about the tooth chipping.
Dennis Hartlieb: Did you know that enamel, the outside surface of the tooth, is the hardest
substance in the human body? That’s
right – your enamel is harder than your bones! Enamel is harder than your bones [I
say it twice for emphasis].
Patient: [Stares back trying to take in this new information.]
Dennis Hartlieb: “That’s
really interesting” [Yep, I say that
again too.].
“I wonder if the tooth has gotten weakened over time, and because the tooth was weak, that’s why it broke. I wonder, sometimes we’ll see this happening with patients that grind or clench their teeth”.
At this point, I try to not say anything, and let the patient talk. They will typically respond saying one of two things:
Patient:
1. “You know, my last dentist told me that I grind my teeth at night, but my husband said that he never hears me grinding. So I don’t think that I do”.
2. “Yeah, I know that I grind my teeth, and my last dentist made me one of those grinding guards, but I don’t wear it anymore”.
1. “You know, my last dentist told me that I grind my teeth at night, but my husband said that he never hears me grinding. So I don’t think that I do”.
2. “Yeah, I know that I grind my teeth, and my last dentist made me one of those grinding guards, but I don’t wear it anymore”.
Dennis Hartlieb: “How
interesting! I wonder if maybe there is
something going on – maybe your grinding has something to do with the chipping of the front teeth. I tell you what, how about I take a look. If I
see anything interesting, do you mind if I take a couple photographs so that I
can share with you what I am seeing?”
Patient: “Sure, that would be fine”.
Dennis Hartlieb: “Ok, let’s take a look!”
It is important,
before we even talk to the patient about why the chipping is occurring, to have
them start thinking about what they are doing that is causing this
chipping. Was it really the fork’s
fault? I want them to start thinking as
I’m looking in their mouth - “Maybe the
other dentist was right – maybe I am grinding my teeth”.
Following my examination of their teeth
(and how their teeth rub together), I show the patient my intraoral
camera. “This is my little spy camera,”
I tell the patient. ”I’m going to take some pictures of your teeth so you can
see exactly what I am looking at”.
The first photos are from the facial – the
view of the teeth that the patient already sees. I’ll identify the same chip(s) that the
patient has identified with their chief complaint. After the patient is seated upright, we put
the photographs from the intraoral camera on the monitor in front of the
patient.
The conversation will go something like this:
The conversation will go something like this:
Dennis Hartlieb: “Ok, so here's the view of your teeth that
brought you in today…that’s the chip that I think that you saw [or felt] – correct?”
Patient:
“Yep, that’s it…it looks bigger on this screen!”
Dennis Hartlieb: [chuckles] “I know, these cameras and
screens sure show everything! Now, I want to show you a view of your tooth that
you cannot see. Imagine that we shrunk you, and now you’re inside your mouth,
lying down on your tongue looking up at the clouds – or the roof of your
mouth. This is what the inside of those upper teeth look like”.
And then I show them the lingual incisal view. I’ll start out by pointing out the chipped facial incisal areas.
And then I show them the lingual incisal view. I’ll start out by pointing out the chipped facial incisal areas.
Dennis Hartlieb:
“This chip here is the same chip that you see from the front – what brought you
here today.”
Then I’ll continue on…
Then I’ll continue on…
Dennis Hartlieb: “Can you see this darker yellow area? It looks almost like a
groove. Can you feel that? Some people, once I point it out, can feel it
with their tongue. Others feel it with their fingernail”.
Patient: “Yeah, I never noticed that before. What is that?”
Dennis Hartlieb: “You’re not going to believe this, but that
is the inside of your tooth! You’ve actually rubbed away all of the enamel over
the edge of your tooth and now you have the inner part of the tooth
exposed. We call that tooth area
‘dentin’.”
Patient: “Wow!”
Dennis Hartlieb: “So before we talk about how we fix these, we
need to talk about one other possible issue.”
Now I need to be careful here: I really don’t want to overwhelm the patient, but I do need to address a possible erosion issue secondary to the wear.
Now I need to be careful here: I really don’t want to overwhelm the patient, but I do need to address a possible erosion issue secondary to the wear.
Dennis Hartlieb: “In my experience, when I have a patient that
just grinds their teeth, I’ll see their teeth get shorter as their upper and
lower teeth rub against each other” [I
use my hands to demonstrate how the lower teeth rub against the uppers]. “Does that make sense?”
Patient: “Yep, I get that.”
Dennis Hartlieb: “Now as the teeth are rubbing together, the
front edges of the teeth might chip, but edges where the teeth are rubbing
against each other are usually flat – they’re sort of sanding each other down.”
Patient: [Nods
head in agreement]
Dennis Hartlieb: “So here’s what I’m wondering – why do you
have these ditches in the edges of the teeth?”
[I pause].
“What I’ve seen with other patients that have these ditches, is that there is something else going on besides just grinding of their teeth – they tend to have a high acid level that is weakening the tooth structure”.
[I pause].
“What I’ve seen with other patients that have these ditches, is that there is something else going on besides just grinding of their teeth – they tend to have a high acid level that is weakening the tooth structure”.
Patient: [Looks at me puzzled]
Dennis Hartlieb: “If
we’re just grinding our teeth, then our teeth would just be worn and flat. But, if we put some acid over the edges, the
acid will start eroding the weak part of the tooth – the part where the enamel
has been rubbed away…right here on the edge.”
Patient: [Nods their head in agreement]
Dennis Hartlieb: “I
want to talk about how we fix and protect your teeth, but I wonder if at some
point we should have a conversation about the wear and erosion of the teeth,
and what might be causing that. Should
we talk about that now – or should we talk about it down the road after you’ve
had some time to digest our conversation from today?”
Then I’ll let the patient dictate where the conversation goes:
Then I’ll let the patient dictate where the conversation goes:
1. Restoration of the
teeth;
2. What’s causing the
erosion/wear?
Related Course: CPR for the Worn Dentition
I have found that
many of my patients do want to know why the teeth are eroding, but there are
many patients that are just looking for a simple solution now. It may be that they are overwhelmed with
work, family, or life issues. The patient simply may not be ready to start
dealing with issues that they know that they should deal with. In my opinion, that’s ok. When they’re ready, we’ll be ready to
talk. But if they are not ready, let's
at least protect their teeth for the time being. Even if they are not ready to talk about the
issues that are causing the teeth to fail, and those issues may cause our
dentistry to fail earlier than ideal, it’s still an option to treat their
teeth.
I will tell the patient this if they decide not to talk about what is causing the problem:
I will tell the patient this if they decide not to talk about what is causing the problem:
Dennis Hartlieb: “I
totally understand that now is not a good time for you to take a deep dive into
this. So let's put it on the back burner for now. When you’re ready, I’ll be ready. It’s important to understand that whatever is
causing your teeth to breakdown will have the same effect on the
dentistry. We need to do the dentistry
to protect the teeth, but the lifespan on the dentistry will be affected.”
If the patient is
open to further discussion at this point, we’ll talk about common acid insults
on teeth. We’ll talk first about dietary issues: beverages that are highly
acidic, sucking on citrus, etc. I’ll then
talk about vomiting and the effect that can have on teeth. Finally, I talk about gastric reflux, or
GERD. Most patients will deny acid
reflux when sleeping, though there are some that will note that they are taking
an over-the-counter med to combat their reflux. The conversation on reflux will then open the doorway to talk about
sleep apnea, or sleep disordered breathing. I explain that I have seen in my practice a lot of patients that grind
their teeth and have these NCIL’s, that it turns out that they have an
undiagnosed sleep apnea issue. I explain
that wear and erosion of the teeth are the first clue to issue with not
breathing well while we are sleeping. From here, we might screen the patient with a pulse-oximeter or refer to
the patient’s primary care doc for evaluation given our insights. I very much let the patient determine the
flow of this conversation as it is most certainly the first time that many of
them have had anyone talk to them about sleep apnea issues.
Besides cosmetic
dental patients, I see quite a few new patients who are looking for
comprehensive care or a general examination. It never fails to amaze me how many new patients, who are only looking
for general dental care treatment, have these undiagnosed NCIL’s. I have found these patients open to
conversations about the wear and erosion that I find during the
examination. I am very careful to allow
the patient to determine the level of conversation that we get into during the
exam. If they are not ready to go into
the deep dive, it's ok. It is my
obligation to bring the information to their attention (standard of care), but
if they are not ready to proceed with treatment at this time, it’s ok. We just
need to be there to support them for when they are ready to move forward ("Standard of Caring, Dr. Paul Homoly)
Alright, so let’s get into the restoration of the NCIL. There are three types of maxillary incisor NCIL restorations:
Alright, so let’s get into the restoration of the NCIL. There are three types of maxillary incisor NCIL restorations:
1. NCIL – No Facial Coverage
1. Anesthesia (local infiltrate) –
this is optional, though I typically anesthetize my patients
2. Shade Selection
3. Pumice teeth aggressively to eliminate plaque, staining and pellicle
4. Use Brasseler Microbur - to create trough - about 1 mm depth – internal enamel rim from mesial to distal
5. Use Brasseler Microbur - to remove sharp edges and blend internal axial wall of trough to incisal edge
6. Total Etch or Selective Etch protocol (previous post on this topic if desired)
7. Inject Nanofill composite, blend with composite instrument, polymerize
8. Contour with ET9, OS1 (Brasseler)
9. Polish with Featherlite wheels (Brasseler)
Worn and chipped incisal edges
Worn and chipped incisal edges
Brasseler 889M012
Incisal Trough complete
Brasseler 830M012
Brasseler 830M012
Nanofill composite
Nanofill composite
2. NCIL – Facial Coverage, no length added
1. Anesthesia (local infiltrate) –
this is optional, though I typically anesthetize my patients
2. Shade Selection
3. Pumice teeth aggressively to eliminate plaque, staining and pellicle
4. Use Brasseler 889M012 Microbur - to create trough - about 1 mm depth –internal enamel rim from mesial to distal
5. Use Brasseler 830M012 Microbur - to remove sharp edges and blend internal axial wall of trough to incisal edge
6. Flame shape diamond to bevel
7. Total Etch or Selective Etch protocol (see previous post on this topic if desired)
8. Inject Nanofill composite, blend with composite instrument to build lingual wall, continuation of bevel, polymerize
9. Place Microfill composite, blend onto etched, unprepared enamel, polymerize
10. Contour with ET9, OS1 (Brasseler), Flexidiscs (Cosmedent)
11. Polish with Featherlite wheels (Brasseler)
Incisal Chipping
Brasseler 889M012
Brasseler 889M012
Brasseler 830M012
Brasseler 830M012
Flame shaped diamond bur
Brasseler 830M012
Nanofill
Nanofill and Microfill
3. NCIL – Facial Coverage, Adding Length
1. Anesthesia (local infiltrate) – this is optional, though I typically anesthetize my patients
2. Shade Selection
3. Pumice teeth aggressively to eliminate plaque, staining and pellicle
4. Use Brasseler 889M012 Microbur - to create trough - about 2 mm depth – internal enamel rim from mesial to distal
5. Use Brasseler 830M012 Microbur - to remove sharp edges and blend internal axial wall of trough to incisal edge
6. Flame shape diamond to bevel – length of bevel should equal amount of tooth to add
7. Total Etch or Selective Etch protocol (see previous post on this topic if desired)
8. Inject Nanofill composite, blend with composite instrument to build lingual wall, continuation of bevel, polymerize
9. Opaquer as needed to blend composite to tooth structure (Creative Colors, Cosmedent
10. Place Microfill composite, blend onto etched, unprepared enamel, polymerize
11. Contour with ET9, OS1 (Brasseler), Flexidiscs (Cosmedent)12) Polish with Featherlite wheels (Brasseler)
Nanofill
Nanofill
Nanofill
Nanofill
Nanofill
Nanofill
Nanofill
Dennis Hartlieb, DDS, AAACD
DOT Founder
Share this page
Latest from our blog

Our vision is to provide online continuing education workshops and mentorship that are comprehensive for dentists learning at all career levels. DOT is developed for dentists that love to learn online.
CONNECT
Materials Included
Light Brown tints, Enamelize, Unfilled Resin Flexidiscs, Flexibuffs 1/2", #1 artist’s brush, Silicone Polishing Points, IPC Off Angle Short Titanium Coated Composite Instrument
Materials Needed, not Included
- Loupes
Follow along
You are Registered
We’re excited to have you join us! You’ll receive email reminders at with the link to join this event.
If you have any questions in the meantime, feel free to reach out to us at dot@dothandson.com—we’re here to help!
Day 1 (8 - 4 pm CST)
-
Erosion and wear – the why and the how
-
Adding length to teeth – when is it safe
-
Opening VDO to compensate for lost tooth structure – where to begin
-
Records visit and key points you need to understand before you start
-
The smile – the 7 strategic points to consider when evaluating the smile
-
Anterior tooth shape, morphology
-
Clinical case review
-
Upper Putty matrix construction
-
Build lingual incisal wall with putty matrix #6 - #11/ Upper anteriors
-
Full contour build-up #6, #7, #8, #9, #10, #11, shape and polish/ Upper anteriors
Day 2 (8 - 2 pm CST)
-
Who – which patients are candidates
-
Why – explaining to patients the value of the prototype
-
How – step-by-step techniques to maximize predictability, efficiency and success
-
Getting to Yes: conversations with patients about esthetic and reconstructive dentistry
-
The ‘Smile Preview’ – techniques to show the possibilities
-
Lower Putty matrix construction
-
Build lingual incisal wall with putty matrix #22 - #27 / lower anteriors
-
Build-up #22 - #27, shape and polish / lower anteriors
-
Build-up lower occlusal posteriors
-
Demonstration of Smile Preview
Upcoming Virtual Workshops
Write your awesome label here.
December 11 & 12, 2025
CPR for the Worn Dentition (16 CE)
Write your awesome label here.
January 29-30, 2026
Porcelain Veneer Cementation Workshop (14 CE)
Write your awesome label here.
March 27, 2026
Esthetic and Functional Success for Diastema Closure (8 CE)
Write your awesome label here.
May 15, 2026
From Break to Beautiful: Flawless Class IV Resin Restorations (8 CE)
Write your awesome label here.
June 19, 2026
Mastering Intraoral Scanners and Digital Workflow for the Dental Team (4 CE)
Write your awesome label here.
September 25, 2026
Veneering the Dark Central Incisor - Conservative Direct and Indirect Restorative Strategies (8 CE)
Write your awesome label here.
October 30, 2026
3D Printing for the Restorative Dentist
Write your awesome label here.
December 11, 2026
Injection Molding Workshop (8 CE)
Write your awesome label here.
Study Club
Join five in-depth virtual meetings held on Thursday evenings throughout the year. Engage in detailed case presentations, discuss curated research articles, and exchange valuable tips with fellow dentists.
-
01/22/2026
-
04/09/2026
-
06/11/2026
-
10/15/2026
-
12/10/2026
Write your awesome label here.
Coffee & Donuts
Kickstart your Friday mornings with informal sessions and discuss patient treatments, practice management, and receive feedback on your cases.
-
01/16/2026
-
02/13/2026
-
03/20/2026
-
04/10/2026
-
05/08/2026
-
06/05/2026
-
08/21/2026
-
10/09/2026
-
11/20/2026
-
12/10/2026
Popular On-Demand Courses
Write your awesome label here.
Injection Moulding Techniques (3 CE)
Simple, predictable, systematic foundation for you to start your journey with injection moulding
Write your awesome label here.
Advanced Techniques in Composite Veneers (6 CE)
Take control of aesthetic cases in your practice, whether you are enhancing smiles with direct resin veneers or creating provisional restorations for indirect cases.
Write your awesome label here.
A Realistic Perspective on Occlusal Appliances (3 CE)
Learn how to design, fabricate, and manage occlusal appliances with confidence through practical guidance and real clinical case examples.
Write your awesome label here.
Bicuspid Veneer and V-Onlay Preparation (3 CE)
Gain expertise in ‘prep-less’ veneers, buccal cusp reduction, and margin placement methods to enhance your clinical outcomes.
Write your awesome label here.
Class IV Composite Restoration – Polychromatic Approach (3 CE)
This on-demand course covers material selection and advanced layering techniques to help you create natural-looking, long-lasting restorations that set you apart.
Write your awesome label here.
EXOCAD: Foundation (2 CE)
Gain the skills to confidently navigate Exocad, build patient cases, and streamline your workflow using time-saving techniques and presets.
Write your awesome label here.
Class II Direct Resin (3 CE)
Master a reliable approach to Class II restorations by learning how to create ideal proximal contacts that enhance both the strength and aesthetics of your work.