

How to Improve your Composite Polishing
I want to help those that are seeing staining on their bonding cases, either because of the techniques that are being used, or with the materials that we are using to polish.
What are you polishing?
It’s been my experience that many dentists are unsure of the ‘type’ of composite they are using in their practice; let’s review this issue first.
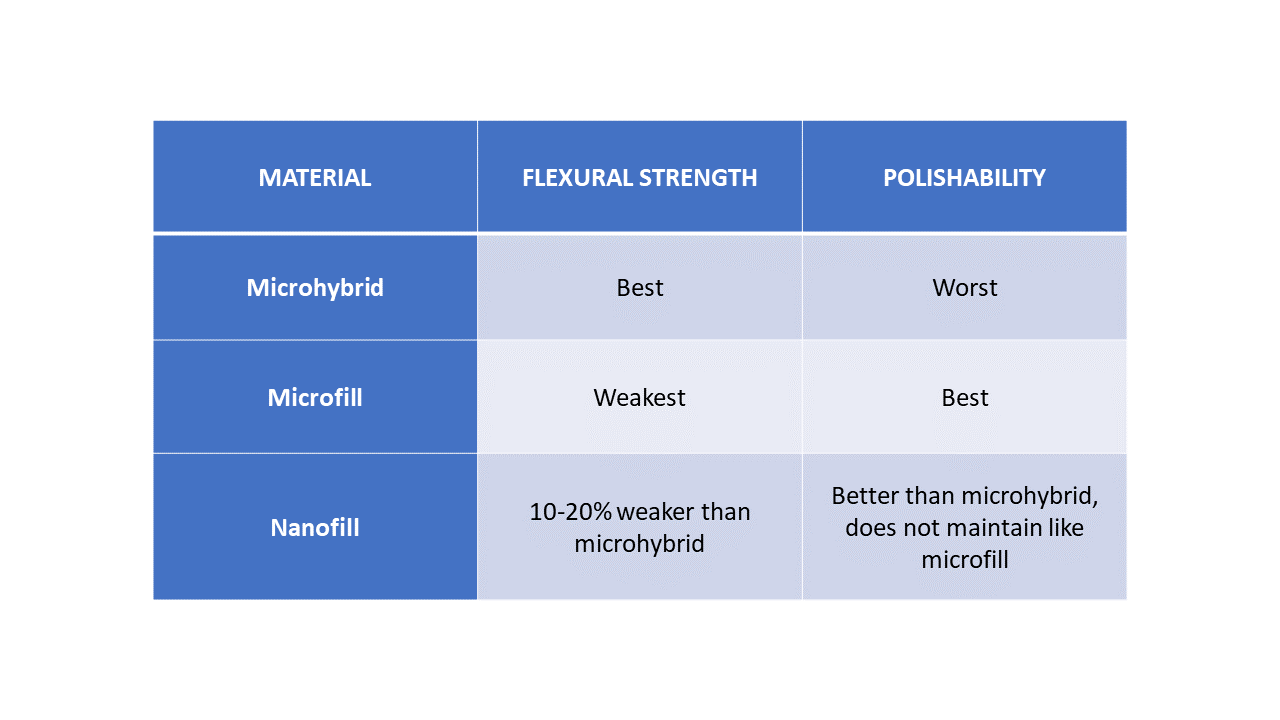
The three direct composites available today are: microhybrids, microfills, and nanofills.
Unfortunatley, the microfill composites have poor flexural strength and are prone to fracture if used on a biting edge. To prevent the microfill fracturing, microhybrid composites would be used to support the microfill, combining the best properties of both materials.
The nano-based composites were introduced to dentistry in the late 1990’s as a ‘Universal’ composite – strong enough to replace the microhybrids where needed for strength, and as polishable as the microfills, where needed for high esthetics.
While the nano-based composites are a step in the right direction for a true ‘universal’ material, evaluation of these materials over time have found that while they are strong, and can replace the microhybrid composite, they are not quite as flexure resistant as the microhybrids. And while the nano-based composites are more polishable than the microhybrids, they fall short of the polishability of the microfills 1.
To simplify the discussion, lets break these three different types of composites into two main assets – strength and polishability.
In my dental practice, for anterior teeth, I tend to use either a microhybrid (if I need greatest strength) or a nanofill for the palatal wall of an anterior restoration. I’ll use a microfill for the facial surface which gives me the ultimate polishability and luster of the restoration. If I am less concerned about ultimate esthetics, like when I do prototype or transitional bonding, then I tend to use a nanofill, or nanohybrid, composite which gives me good strength, and good polishability.
Composite Polishing Systems
The rubber-based polishers will either be a one-step, or a two-step system.
They come in a variety of shapes and sizes, but typically are brush, wheel, cup or point shaped. The polishers are use with a slow-speed handpiece at a slow, to moderate speed, with light to moderate pressure.
The Ultimate Finishing and Polishing Guide for Anterior Composite Restorations
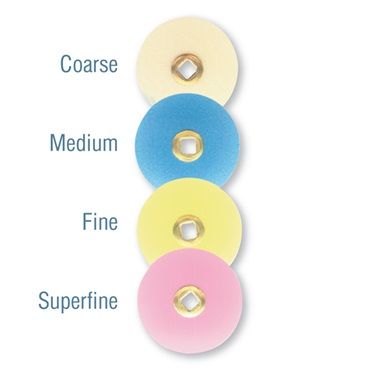
The disc system I would compare to a series of sandpapers that go from coarse grit to super fine grit.
Like
the rubber-based polishers, these are also used with a slow-speed handpiece. Multiple
studies have demonstrated a superior polish of composites, regardless of the
type of composite, when using discs for polishing when compared to the
rubber-based polishers. 1,2,3
There are several good disc systems available, but the disc system that I use is the Mini Flexidisc system from Cosmedent.
- I find it much easier to do contouring, especially working on the facial embrasures, when using discs
- The final polish with discs, once the clinician is experienced, has less surface irregularities
- The final polish maintains best long term when I have used discs for polishing.
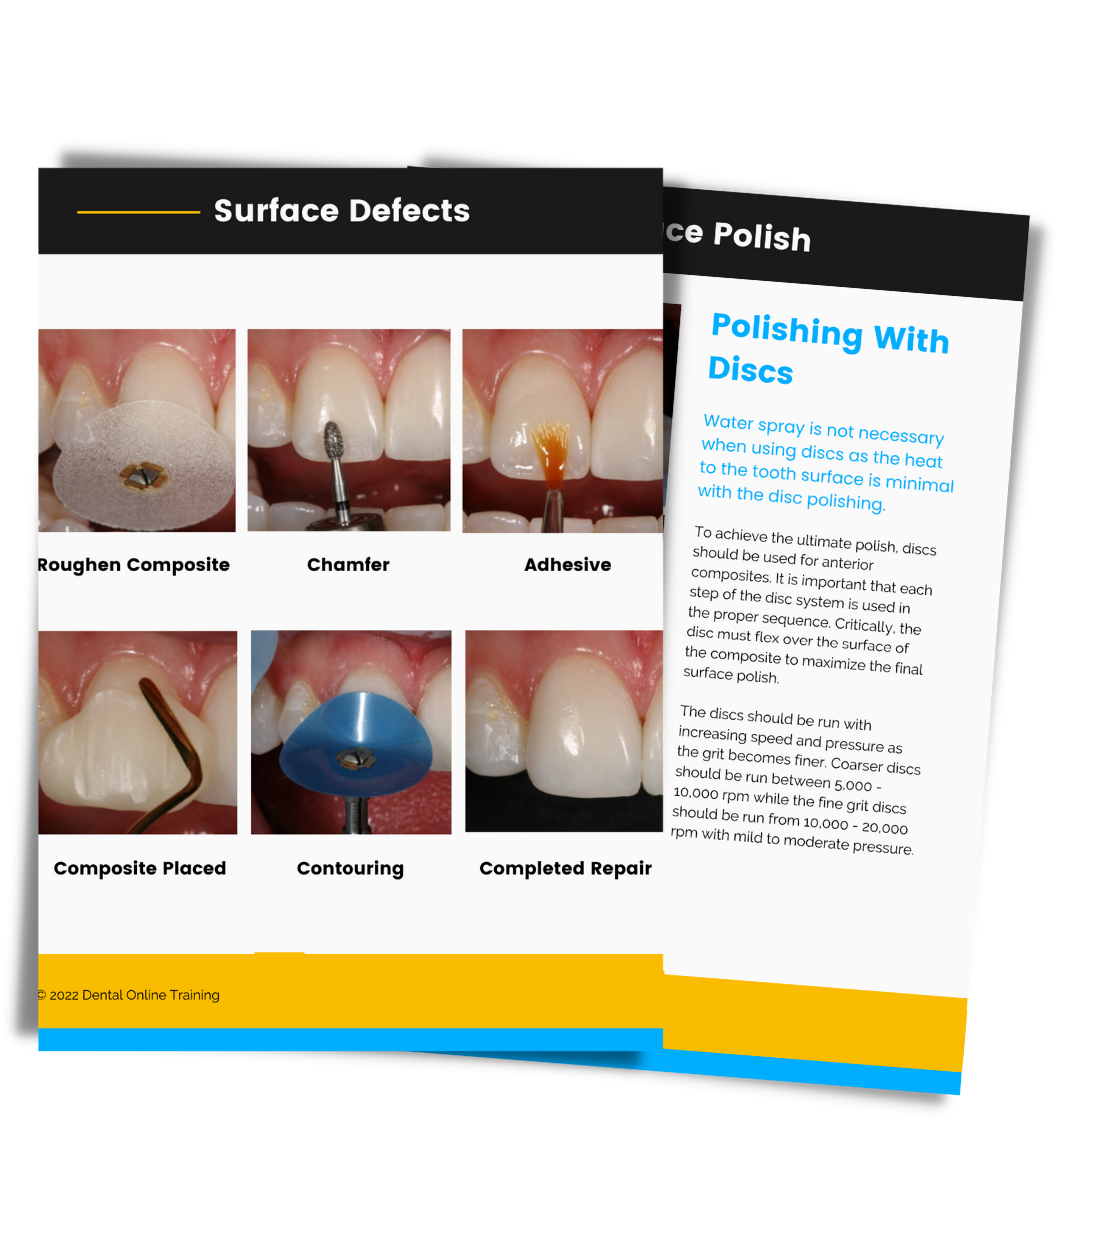
Keys To Using Discs For Composite Polishing
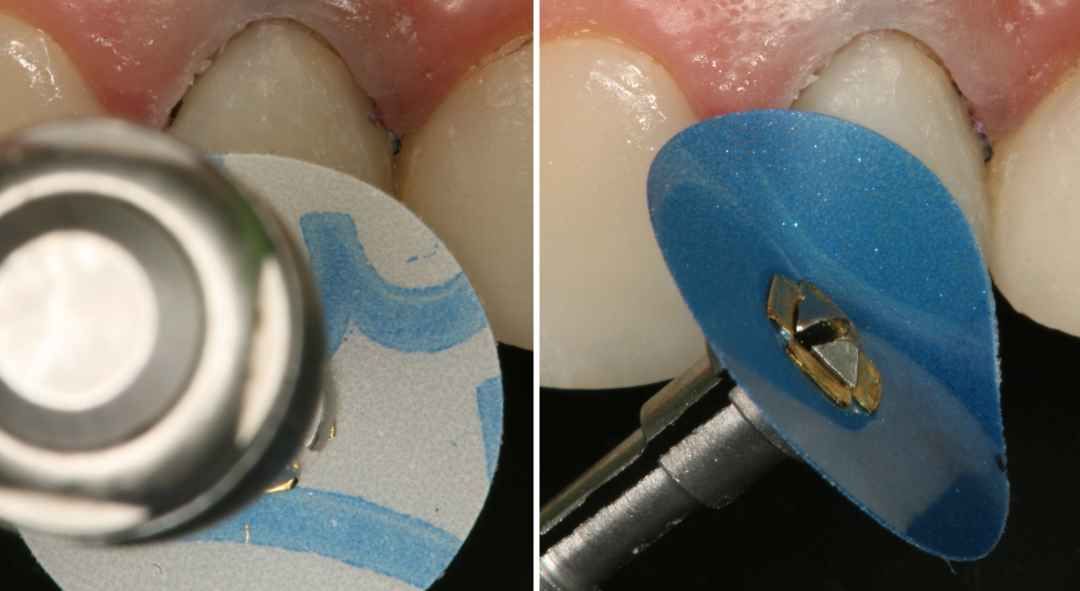
First, it is important to remove all surface defects with the coarse and medium discs.
1- I start with the coarse disc with light pressure and light speed. With an electric handpiece, I’ll be running at around 500-800 rpms. The coarse discs can be quite aggressive, so be careful when using these discs. The discs have ‘flex’ to them, however, the course disc is more rigid. The rigidity helps remove the surface defects without having to use extra-large particle abrasives in the disc.
The final two discs in the system will only enhance any defects.
3- When I am finished with the blue disc, the surface should look smooth and have a matte like finish. The yellow and pink discs are used in sequence, increasing the speed and the pressure applied, being sure to flex the disc over the composite surface, resulting in an incredibly polished composite.
4- As a final step, following either the 2-step rubber-based
polishers, or the 4-step disc polishers, I use an aluminum oxide polishing paste
(Enamelize, Cosmedent) with a buff disc (Flexibuff, Cosmedent) for the ultimate
luster.
Back to the Patient
The biggest advantage to me with the two-step rubber-based polishers is time; the 2-step polishing systems are absolutely, in my hands, faster than using the 4-step disc polishing systems.
When I am in a time crunch, or when I am working on a patient that I am less concerned about potential staining, then I will tend to use the two-step polishers, i.e. Feather-Lites.
Keep in mind though that staining of the composites in the anterior esthetic zone can be a real practice killer. So, if time allows, use the 4-step disc systems to get ultimate polish of your composites.
Footnotes:
- The
Effect of Different Polishing Methods and Storage Media on Discoloration of
Resin Composites
Deljoo Z, Sadeghi M, Azar MR, and Bagheri R, J Dent
Biomater. 2016 Jun; 3(2): 226–232.
- Comparative
evaluation of effect of different polishing systems on surface roughness of
composite resin: An in vitro study
Rashmi G. Chour, Aman Moda,1 Arpana Arora,2 Muhmmed Y. Arafath, J , Int Soc Prev
Community Dent. 2016
Aug; 6(Suppl 2): S166–S170.
- Comparison of Two-Step Versus Four-Step Composite Finishing/Polishing Disc Systems: Evaluation of a New Two-Step Composite Polishing Disc System JB da Costa ; F Goncalves ; JL Ferracane, Oper Dent (2011) 36 (2): 205–212.
Dennis Hartlieb, DDS, AAACD
Share this page
Latest from our blog

CONNECT
Materials Included
Light Brown tints, Enamelize, Unfilled Resin Flexidiscs, Flexibuffs 1/2", #1 artist’s brush, Silicone Polishing Points, IPC Off Angle Short Titanium Coated Composite Instrument
Materials Needed, not Included
- Loupes
Follow along
You are Registered
-
Erosion and wear – the why and the how
-
Adding length to teeth – when is it safe
-
Opening VDO to compensate for lost tooth structure – where to begin
-
Records visit and key points you need to understand before you start
-
The smile – the 7 strategic points to consider when evaluating the smile
-
Anterior tooth shape, morphology
-
Clinical case review
-
Upper Putty matrix construction
-
Build lingual incisal wall with putty matrix #6 - #11/ Upper anteriors
-
Full contour build-up #6, #7, #8, #9, #10, #11, shape and polish/ Upper anteriors
-
Who – which patients are candidates
-
Why – explaining to patients the value of the prototype
-
How – step-by-step techniques to maximize predictability, efficiency and success
-
Getting to Yes: conversations with patients about esthetic and reconstructive dentistry
-
The ‘Smile Preview’ – techniques to show the possibilities
-
Lower Putty matrix construction
-
Build lingual incisal wall with putty matrix #22 - #27 / lower anteriors
-
Build-up #22 - #27, shape and polish / lower anteriors
-
Build-up lower occlusal posteriors
-
Demonstration of Smile Preview
Upcoming Virtual Workshops
-
01/22/2026
-
04/09/2026
-
06/11/2026
-
10/15/2026
-
12/10/2026
-
01/16/2026
-
02/13/2026
-
03/20/2026
-
04/10/2026
-
05/08/2026
-
06/05/2026
-
08/21/2026
-
10/09/2026
-
11/20/2026
-
12/10/2026