If it hasn’t happened to you yet, it will: Your patient calls and tells the office that the implant that you restored is loose. There are five things that could be causing the ‘loose implant’:
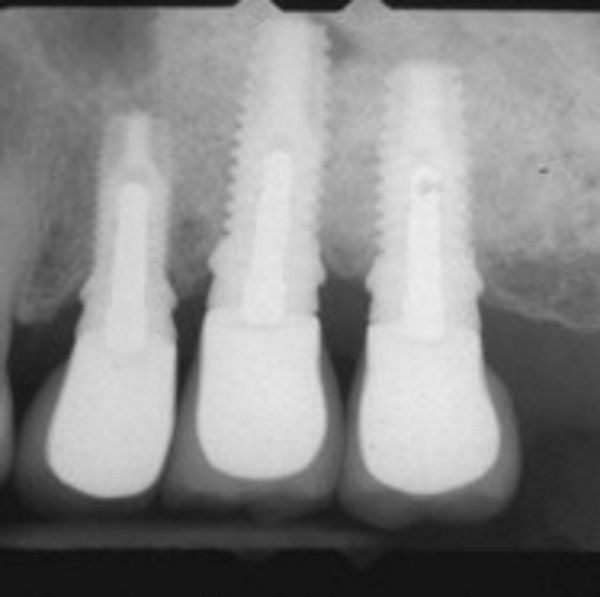
The implant integration has failed, and the implant itself is loose. This is typically diagnosed from a radiograph, or several radiographs from different angles, identifying loss, or lack of bone, surrounding the implant.
So the abutment/crown (still connected as one) are loose. The implant radiographically looks normal, but the crown is definitely moving.
The crown is no longer cemented to the abutment. The proximal contacts of the neighboring teeth are keeping the crown from detaching. In this situation, we can typically visually verify that the crown is lifting off but locked into the undercuts of the neighboring teeth.
This would be the case with zirconia abutments. The soft tissue is attached to the zirconia. So, a portion of the zirconia is still screwed to the implant, but the occlusal portion of the abutment has broken free. There is a strong epithelial attachment of the soft tissue to the zirconia keeping the fractured zirconia and crown from falling out. This is similar to the looseness of a baby tooth where there is no root remaining, but the tooth is still in the mouth, but loose. Another comparison would be fractured tooth where the coronal portion of the tooth is still in the mouth, but has broken away from the root.
Ultimately the zirconia/crown lift away from the titanium base, but the soft tissue adherence (see #4) keeps the abutment/crown from falling off.
Today’s blog is going to review what to do if the “loose implant” is actually the second issue I listed above – a loose abutment screw (watch video).
This is obviously a much easier problem to solve than some of the other problems, but what if the implant crown is a cemented crown, and not a screw retained crown? The challenge in these scenarios is to gain access to the abutment screw without destroying the crown.
In a perfect world, the implant would have been ideally placed and the abutment screw access hole would be centered in the occlusal table. Unfortunately, life ain’t always perfect. We can use periapical x-rays to help the implant position and angulation. We can deduct from the x-ray if the access hole is more towards the mesial or the distal of the center of the crown, and the angulation of the access hole. The x-ray won’t tell us if the abutment chamber is more buccal or towards the lingual or palatal.
Alternatively, we could use a cone beam CT scan (CBCT) to give us a 3-dimensional understanding, but the quality of the scan is limited due to the ‘noise’ and ‘scatter’ from the metal of the implant, abutment, and crown. Given the limitations of using x-rays or CBCT, there can be a lot of guess work in trying to access the abutment screw. Under these conditions, it is even more difficult to create as minimal a hole as possible to reduce the stress on the porcelain or zirconia restoration. The more conservative our approach to accessing the abutment screw, the more likely we will have less fracture, ultimately, of the implant crown.
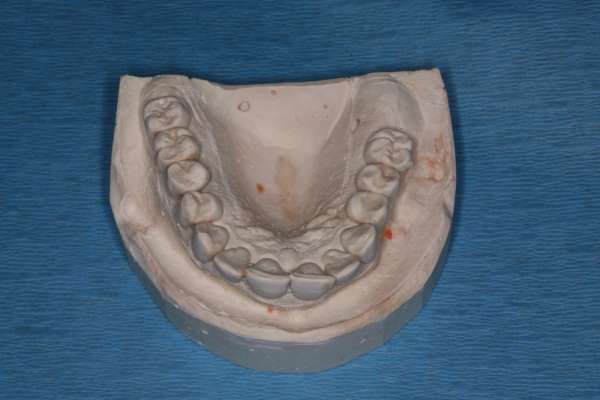
So, here’s my first tip – if you take analog impressions, keep your master model of the implants. Alternatively, do what we do if you have limited storage space at your office – give the implant models to your patients and ask them to keep them somewhere safe, in case you ever need to use the model to help deal with an implant issue. If you take intraoral scans and use scan bodies for your implants, keep that data safe. That stl file can be used to create a solid model down the road, if necessary, to help create an access guide as described below.
You’ll need to see the patient twice, once for an initial (current) impression and once for treatment of the loose implant abutment/crown after you have had some time to do a little lab work.
Also, you’ll need to have available a healing abutment to place over the implant while you are managing the abutment/crown after removal. Ideally, you should also use a new abutment screw – retorquing of the abutment screw can potentially cause stripping of the screw head (big problem) or fracture of the screw (much bigger problem).
The following information is the process that I use if a patient I have treated reports a loose implant (hopefully implant crown):
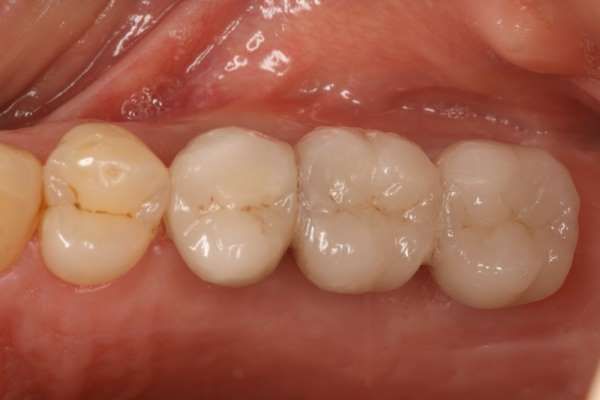
1. An impression (digital or analog) is taken of the patient with the crown in place, even though it is loose.
2. A stone, or resin, model is created from the impression.
3. A vacuform, or Biostar, clear matrix is created. The material chosen would be similar to that used for when creating a provisional crown.
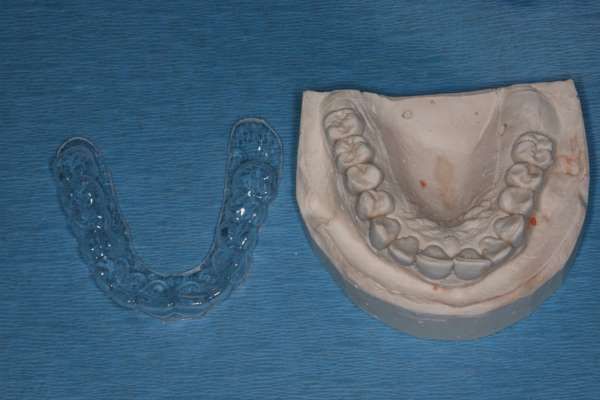
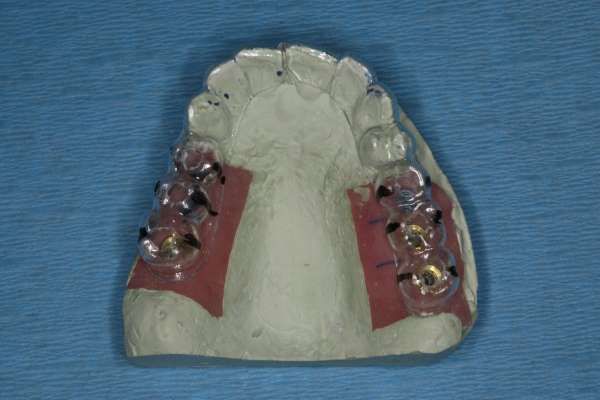
4. The vacuform is trimmed to cover two to three teeth mesial and distal to the loose implant crown (if this is a terminal molar, then I use as much of the edentulous ridge as possible to add stability to the vacuform) and seated on the original implant model. If there has been tooth shifting, it may be necessary to trim the vacuform more than ideally, but you should be able to get a stable seating of the vacuform on the model.
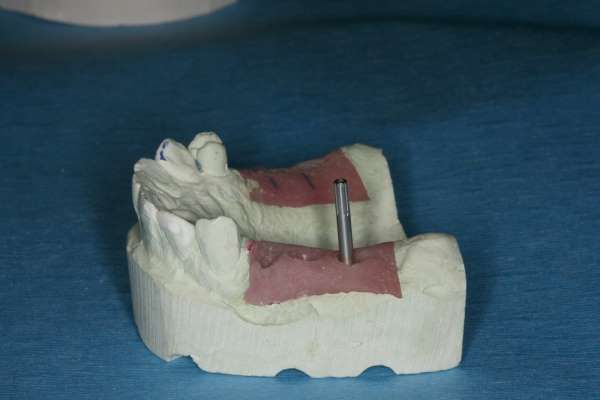
5. I use an impression screw as a guide pin. I screw the impression screw into the implant analog on the master model.
6. I create a small hole in the occlusal portion of the vacuform to allow the vacuform to seat onto the model with the impression screw coming through the vacuform hole.
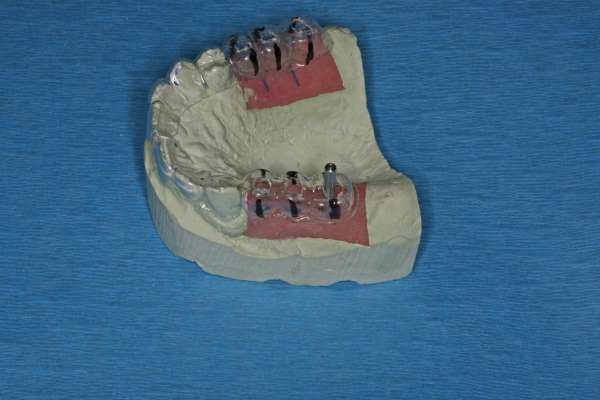
7. Using a black sharpie marker, I draw lines from the facial and lingual that are the same angulation as the impression screw. These lines are critical as they will act as an angulation guide for me when I go to the mouth.
8. The patient returns to the dental office and either topical anesthetic or local infiltration of the dentist’s determination is used.
The vacuform with the access hole and sharpie lines are placed over the quadrant with the loose implant crown.
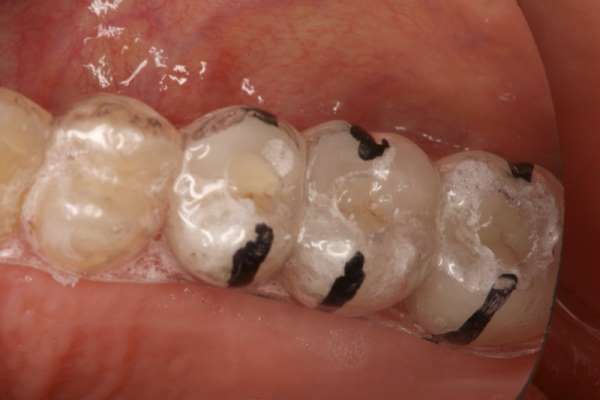
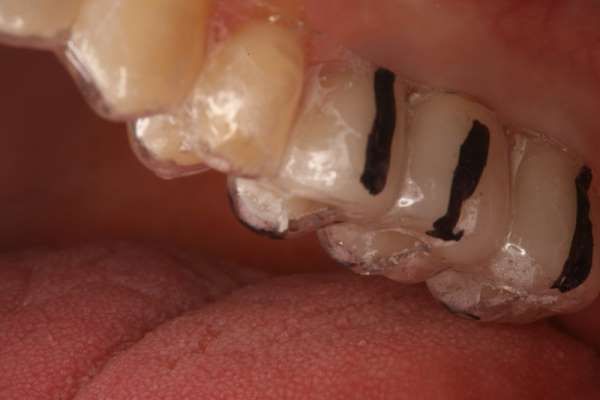
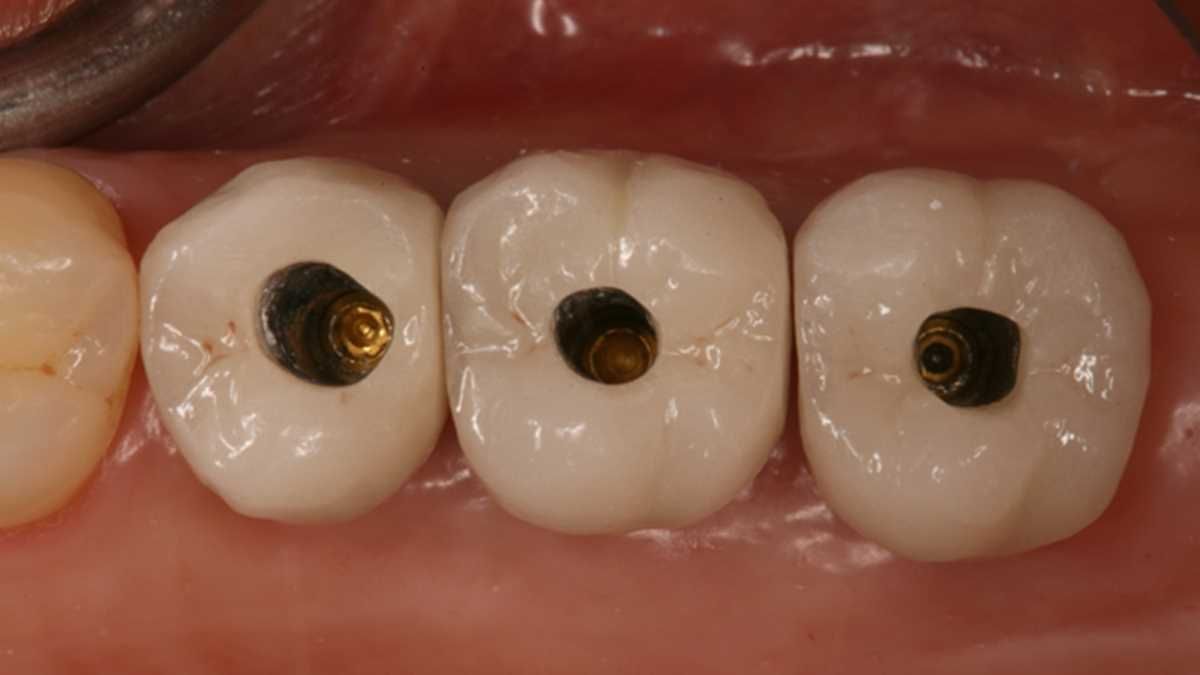
10. A small rounded diamond bur (I like using the ___ bur [Brassler, Inc.]) with copious water spray is used to access thru lithium disilicate (Emax), zirconia, or porcelain-fused-to-metal crowns. For PFM crowns, a carbide bur (i.e. 330, 556) is necessary to cut thru the metal after the superficial porcelain is removed. For Emax and zirconia, it will likely take several burs to get thru these materials.
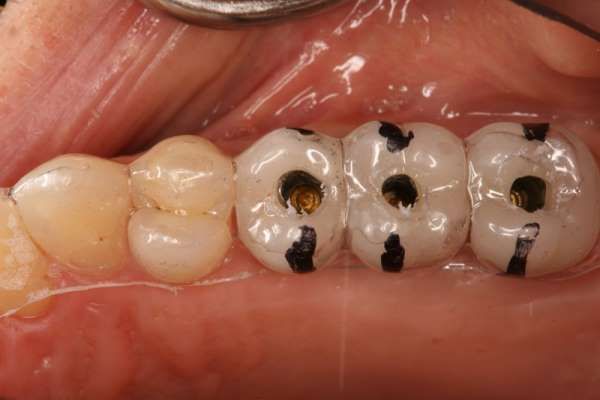
11. It is important to follow the angulation of the screw channel as marked by the Sharpie. This will minimize the amount of material removed during the access of the abutment chamber reducing the risk of porcelain/zirconia fracture.
12. The obturation material (i.e. Teflon tape, impression material, cotton pellet, gutta percha) is removed and the appropriate abutment driver is tried in. It is absolutely critical that the driver is unencumbered and free of friction from the internal walls of the crown. Many times, a tapered fine diamond bur will be necessary to slightly open the access hole to ensure passivity of the abutment driver.
13. I will use finger pressure to unscrew the abutment screw. If I am unable to unscrew the screw using finger pressure only, I now know that the loose crown is not due to a loose abutment screw. I will now need to reconsider if this is a failing implant, a loose crown from the abutment, a Tibase abutment where the crown has separated from the titanium base, or a fractured zirconia abutment. Based on these other scenarios, I will need to determine whether to use a torque wrench and counter-torque the screw understanding that it is possible that the implant, if not integrated, will be removed. If the implant is integrated, the abutment screw should loosen, and the abutment (either in one piece or two) should be able to be delivered with the crown.
14. In cases other than implant failure, I use Peridex to gently scrub and clean the internal of the implant and the soft-tissue area. Hydrogen peroxide and sodium hypochlorite have also been recommended as solutions to cleanse the implant area. A healing abutment is screwed onto the implant with finger pressure. After drying the site, flowable composite is placed and cured, around the abutment to keep the soft tissue from collapsing around the healing abutment.
15. The implant abutment/crown is cleaned with alcohol gauze and placed in an ultrasonic with isopropyl alcohol for several minutes.
16. The healing abutment is removed, the implant abutment/crown is repositioned with a new abutment screw, and tightened with finger pressure. An x-ray is taken to verify complete seating of the abutment/crown. Floss is used to verify appropriate proximal contacts. If the abutment is satisfactorily placed, and the proximal contacts are appropriate, the abutment screw is torqued to manufacturer’s recommendations. If there has been drifting of the proximal teeth adjacent to the implant and there is a resultant open proximal contact, we will need to add to the implant crown, or the neighboring tooth. For information on adding to an existing implant crown in these situations, check out my blog: Clinical Techniques to Manage the Open Proximal Contact on Implant Crowns.
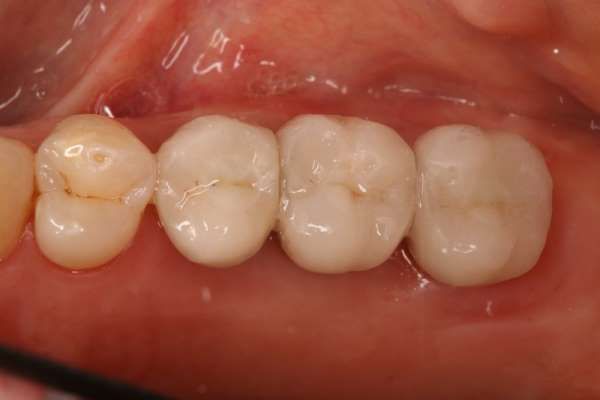
17. With the crown in place, seal the access hole, check the occlusion, and send the patient on their way. If you would like to learn a technique to create an invisible seal of the screw retained implant crown, you’ll find a great technique to follow in our blog post: The Esthetic Seal of the Screw Retained Implant Crown.
Well, I truly hope that this loose implant crown issue doesn’t happen to you, but if it does, I hope that you find this technique helpful.
Yours for better dentistry,