Dennis Hartlieb
Deep Dive into Dentin

Deep Dive into Dentin
Here is an important question: how is it that adhesive dentistry is so complicated? We’ve been bonding to dentin for close to four decades, but there is so much confusion about bonding materials and their usage.
I want to share with you a sample of questions that I have received regarding dentin bonding:
Should we be etching dentin with phosphoric acid anymore?
How long should we etch the dentin?
Should sclerotic dentin be treated differently than non-sclerotic dentin?
Is deep dentin different than superficial dentin for etching?
Should we dry the dentin and re-wet the surface or never dry the dentin at all?
What should we use for re-wetting the dentin surface?
How long should we re-wet the dentin?
Is it safe to use glutalderhyde as a re-wetting agent?
Should we not use phosphoric acid at all on the dentin and instead only use self-etch adhesives?
How long should we prime the surface? How many layers of primer should we place?
How long should we dry the primer?
Should we place a second coat of primer?
Should we cure the primer before placing the adhesive?
Are the one step, Universal adhesives supposed to be used with phosphoric acid or not?
Are the Universal adhesives as good as the other self-etch adhesives?
Those are not even all the questions that I have gotten regarding dentin bonding! There is a lot to think about for one of the most routine but tedious procedures in our restorative dental practices.
Today’s blog may not answer all of your questions, but for those interested in understanding what is going on with dentin bonding, I hope that you will find this helpful.
1. Dentin is not Enamel
As you probably remember from dental school, enamel is about 98% inorganic (mineral, i.e. hydroxyapatite), whereas dentin is about 50% inorganic (hydroxyapatite) and 50% organic (collagen). As a refresher, I want to share some illustrations of what the dentin surface looks like so that we have a better understanding of our bonding systems.

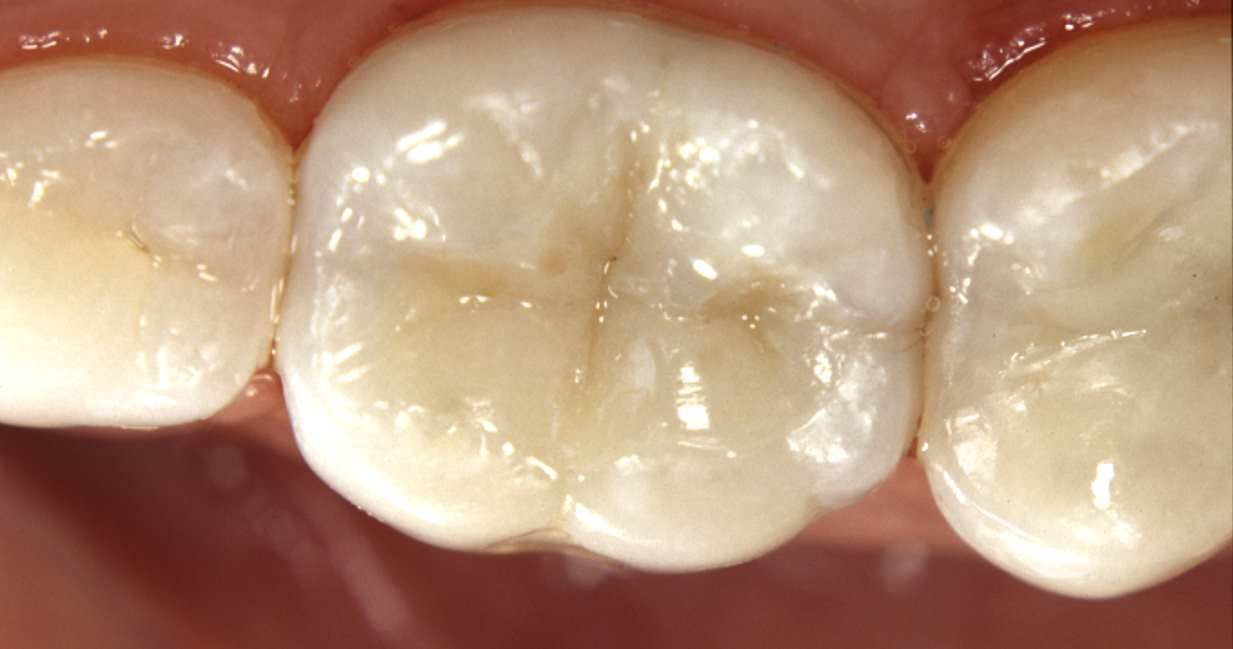
The biggest misconception that I had early on was the thinking that our dentin bond strength primarily comes from the resin tags in the dentin tubules. It turns out that only 15-25% of the dentin bond strength comes from the resin tags in the dentinal tubules. Dentin bond strength mostly comes from the area between the dentin tubules – the intertubular dentin. Here is an occlusal view illustration of a molar demonstrating the difference of superficial dentin versus deep dentin.
Keep in mind that because the dentin tubules get larger as they get closer to the pulp, there is less intertubular dentin for our adhesion. Therefore, the bond strength in deep dentin is going to be less than in superficial dentin. In deeper dentin, we are relying more on resin tags that go into the dentin tubules and less on the intertubular dentin.
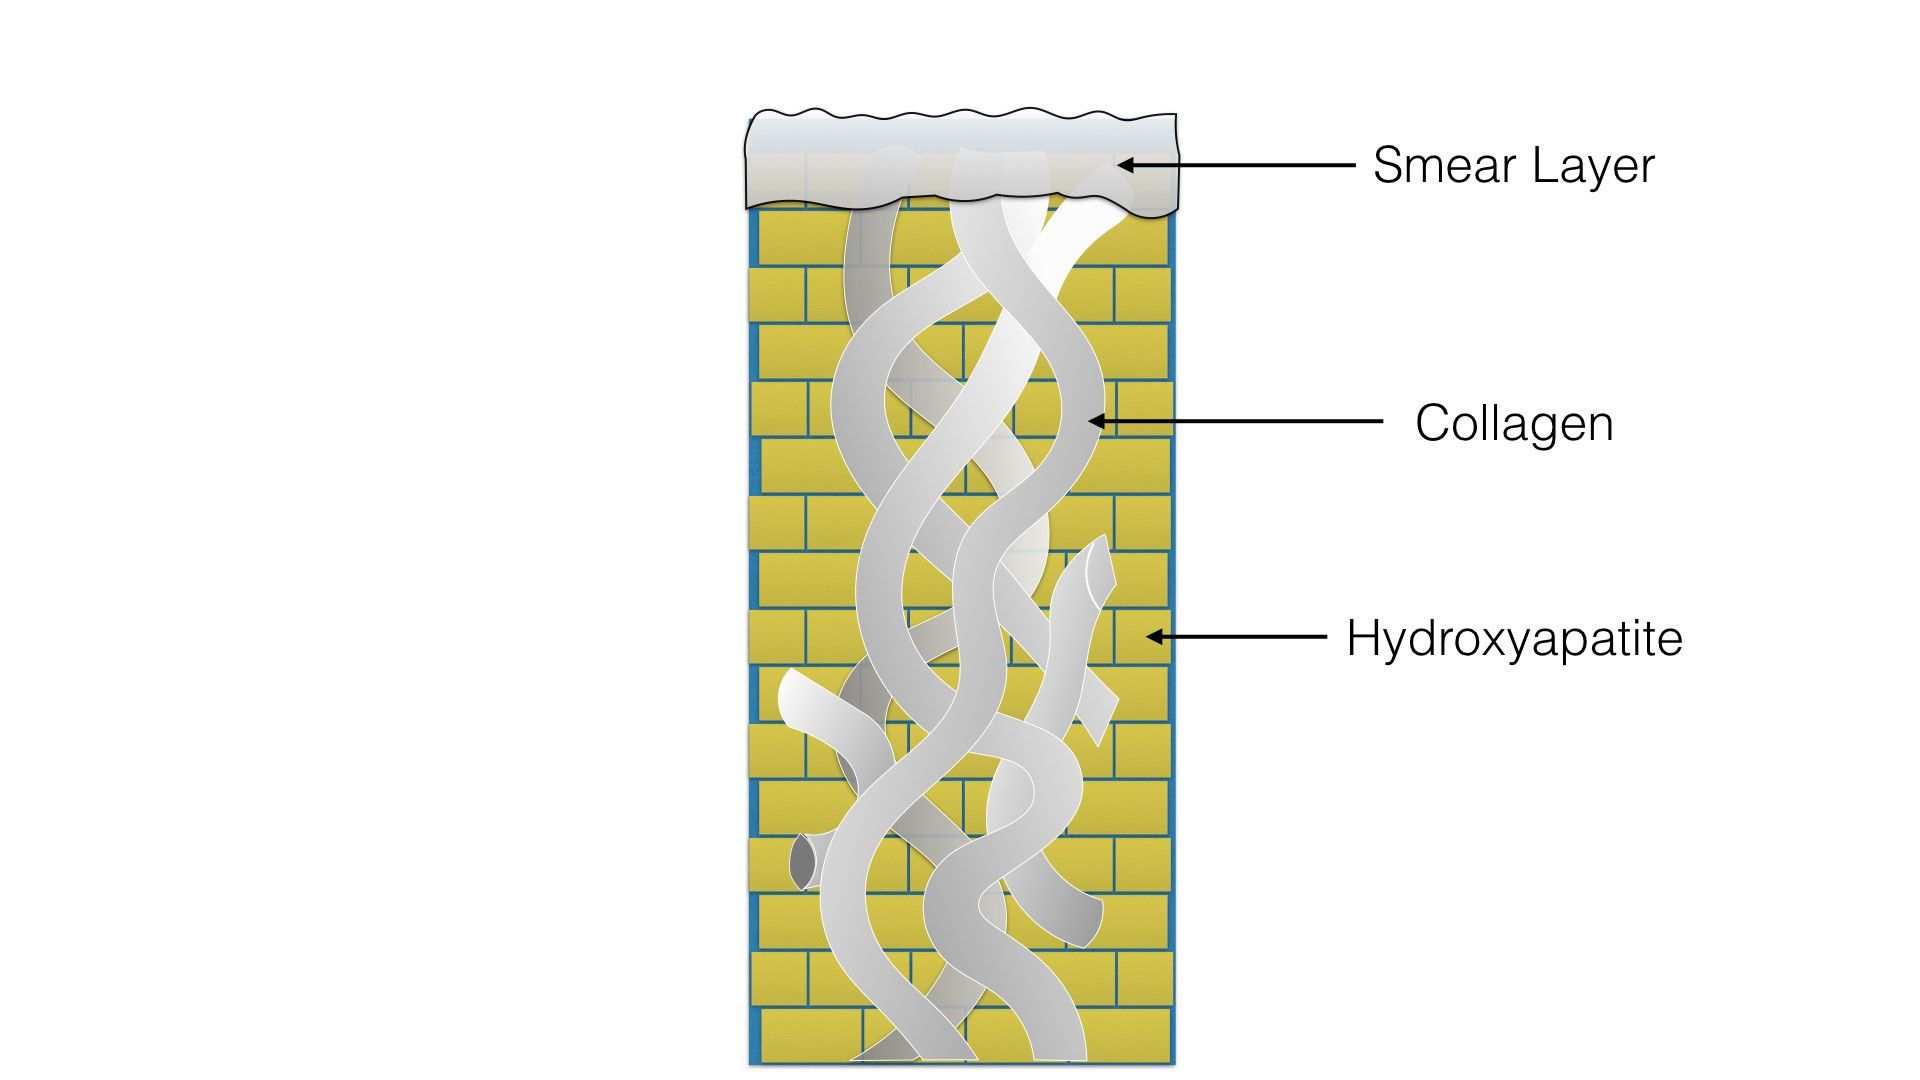
Let’s dive further into dentin as a bonding substrate. I imagine the dentin to be made of two parts – the hydroxyapatite (kind of looking like small bricks to me), and the collagen (like these strands of spaghetti noodles), interwoven within the hydroxyapatite. This illustration is my interpretation of the cross section of dentin after it is prepped:

2. Total Etch vs Self Etch
With the total etch technique, phosphoric acid removes the smear layer and removes the hydroxyapatite from the dentin. After rinsing the phosphoric acid and leaving the surface moist, it kind of looks like this:

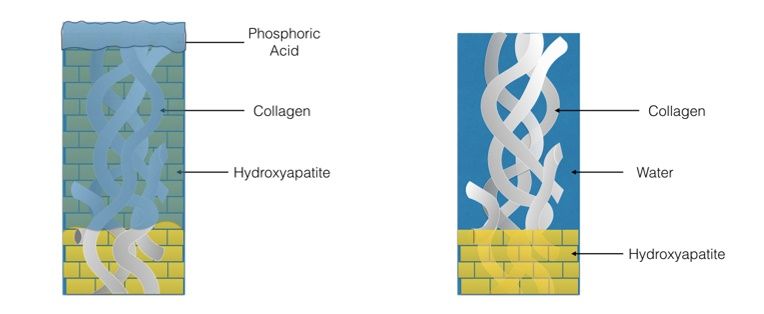
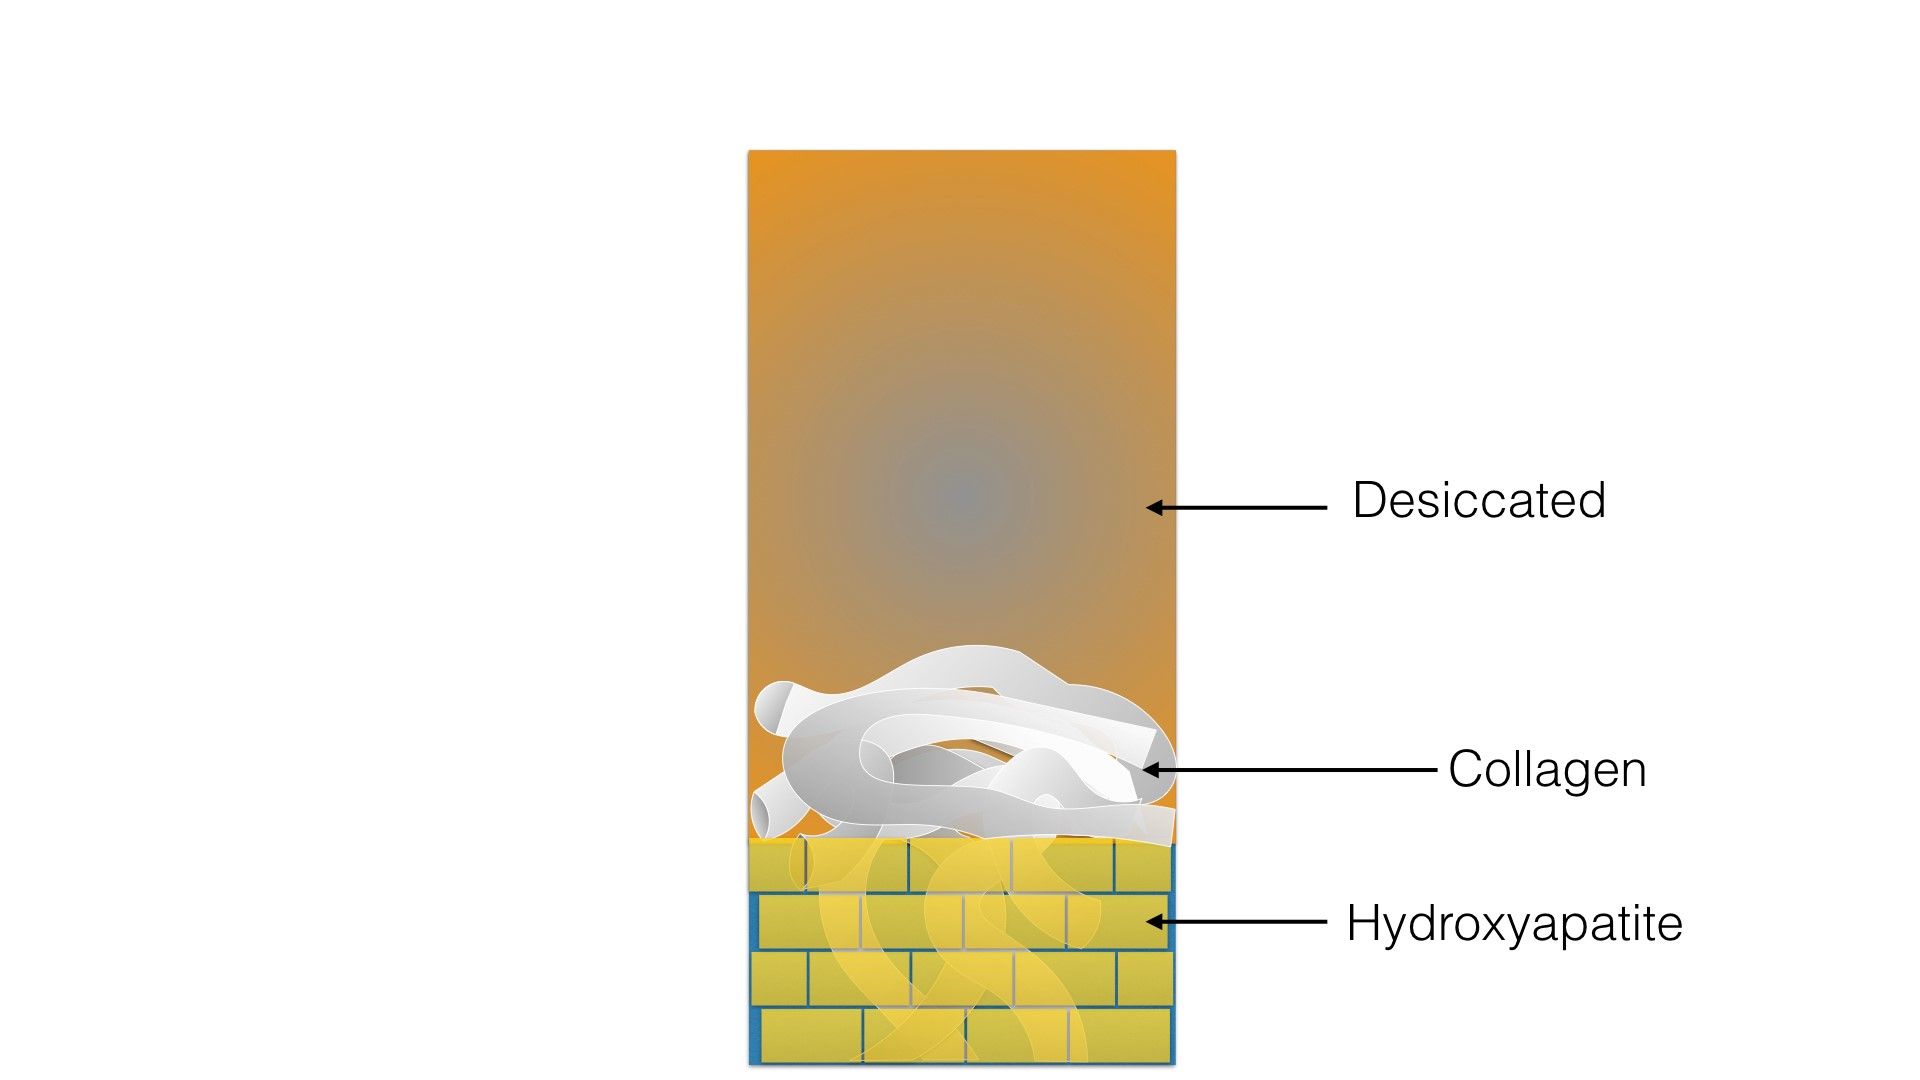
If you dry the dentin the collagen collapses and looks like this:

If you use the total etch system, it’s important that the dentin is left moist, or if dried, remoistened. If you have a particular rewetting agent that you like, and you are successful with the product, don’t change. However, there is new research suggesting that the use of chlorohexidine is helpful to prolong dentin bonding by reducing the effects of proteolytic enzymes. In the technique that I use today - if I’m using the total etch technique where I am etching dentin with phosphoric acid for 15 seconds - I will rinse and dry the tooth after etching seconds and moisten with a product called Concepsis (2.2% Chlorohexidine), from Ultradent. I scrub gently with Concepsis for 30-60 seconds, leaving the dentin moist but not flooded.
Another adhesive option is the self-etch technique. In the self-etch technique, no phosphoric acid is used. An acidic primer is placed over the dentin surface. The acidity breaks down the smear layer and allows impregnation of the adhesive into the superficial dentin surface. Though this hybrid layer is thinner than the hybrid layer that is formed with the total etch, it is more uniform in its content with less defects, creating a more consistent hybrid layer.

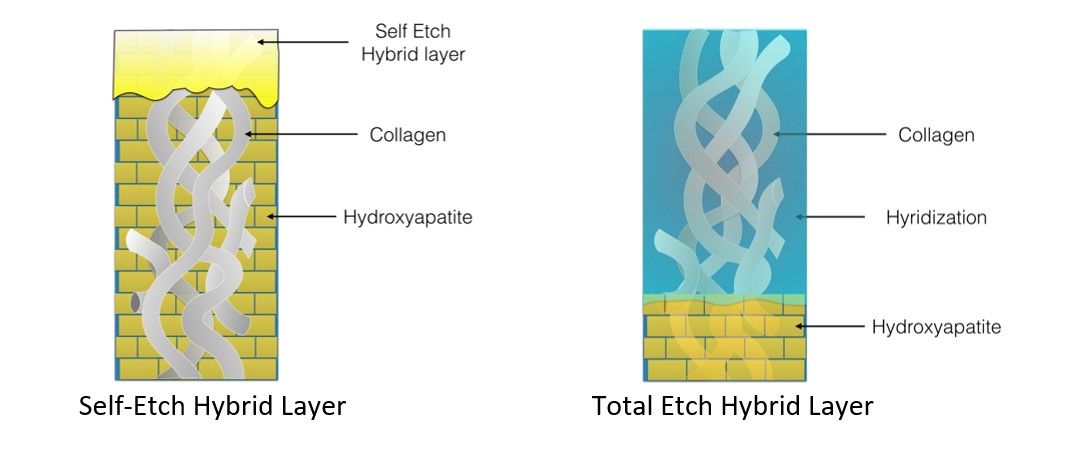
Also, and a biggie for reducing postoperative sensitivity, the dentin tubules are never opened with self-etchers. The self-etchers dissolve thru the smear layer and smear plugs, but typically only the superficial portion of the smear plug. Take a look at my illustrations of the difference, from a self-etch vs phosphoric acid effect on dentin:


Related Course: Posterior Occlusal Restorations
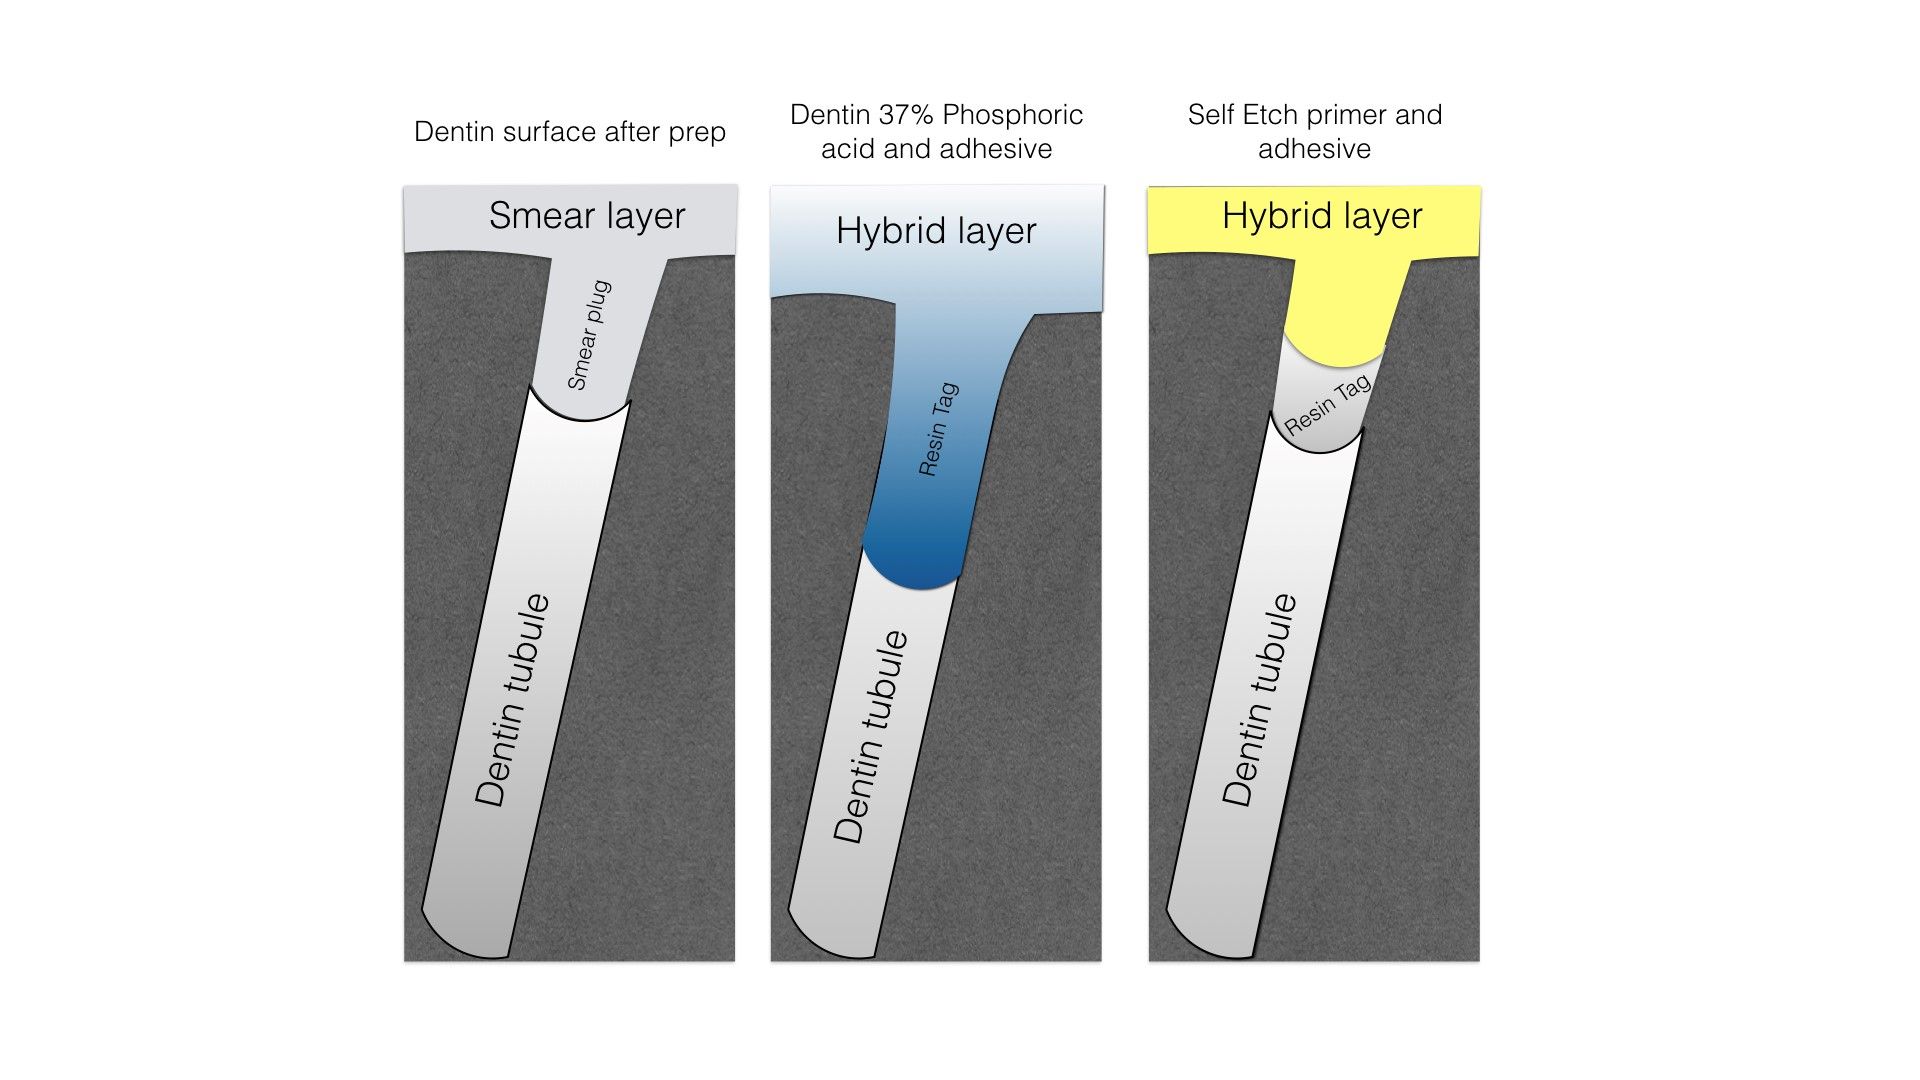
It was this reason, I believe, that self-etchers have become popular: by not removing the smear plugs from the dentin tubules, there is much less potential for sensitivity with dentin bonding. With the bonus of a more consistent smear layer, without voids or disruptions, clinical research has demonstrated that self-etch adhesives can provide a dentin bond that is equal to that found with the best total etch systems. Manufacturers have taken note and have created Universal adhesives, which have taken the common two-step self-etch approach, and created a one-step process. I continue to use 2-step self-etch adhesives because of their long term track record, I believe that the Universal adhesives have a promising future.
My friends, I hope that this review of dentin, and dentin bonding, is helpful.
Please touch base with any questions at https://www.dothandson.com/social.
Yours for better dentistry,
My friends, I hope that this review of dentin, and dentin bonding, is helpful.
Please touch base with any questions at https://www.dothandson.com/social.
Yours for better dentistry,
Dennis Hartlieb, DDS, AAACD
DOT Founder
Join 3,000+ dentists who get monthly restorative dentistry tips
Share this page
Latest from our blog

Our vision is to provide online continuing education workshops and mentorship that are comprehensive for dentists learning at all career levels. DOT is developed for dentists that love to learn online.
CONNECT
Materials Included
Light Brown tints, Enamelize, Unfilled Resin Flexidiscs, Flexibuffs 1/2", #1 artist’s brush, Silicone Polishing Points, IPC Off Angle Short Titanium Coated Composite Instrument
Materials Needed, not Included
- Loupes
Follow along
You are Registered
We’re excited to have you join us! You’ll receive email reminders at with the link to join this event.
If you have any questions in the meantime, feel free to reach out to us at dot@dothandson.com—we’re here to help!
Day 1 (8 - 4 pm CST)
-
Erosion and wear – the why and the how
-
Adding length to teeth – when is it safe
-
Opening VDO to compensate for lost tooth structure – where to begin
-
Records visit and key points you need to understand before you start
-
The smile – the 7 strategic points to consider when evaluating the smile
-
Anterior tooth shape, morphology
-
Clinical case review
-
Upper Putty matrix construction
-
Build lingual incisal wall with putty matrix #6 - #11/ Upper anteriors
-
Full contour build-up #6, #7, #8, #9, #10, #11, shape and polish/ Upper anteriors
Day 2 (8 - 2 pm CST)
-
Who – which patients are candidates
-
Why – explaining to patients the value of the prototype
-
How – step-by-step techniques to maximize predictability, efficiency and success
-
Getting to Yes: conversations with patients about esthetic and reconstructive dentistry
-
The ‘Smile Preview’ – techniques to show the possibilities
-
Lower Putty matrix construction
-
Build lingual incisal wall with putty matrix #22 - #27 / lower anteriors
-
Build-up #22 - #27, shape and polish / lower anteriors
-
Build-up lower occlusal posteriors
-
Demonstration of Smile Preview