DR. DENNIS HARTLIEB
Canine Substitution

Canine Substitution case


Write your awesome label here.
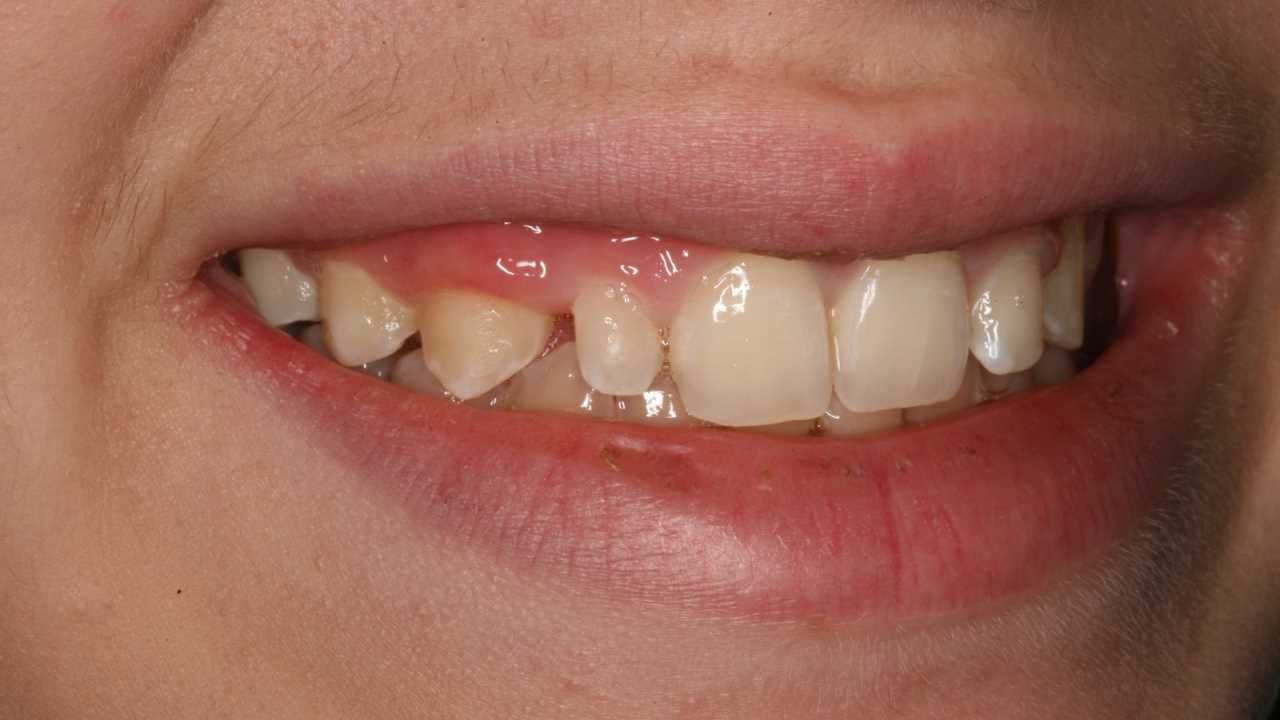
This 14-year-old female was referred to my practice post-orthodontics.
A ‘canine substitution’ case is where the orthodontist intentionally allows the maxillary canines to erupt into the congenitally missing lateral positions, with the intent of having the restorative dentist esthetically restore the canines to appear like lateral incisors.

Read also: Restoring the Peg Lateral Incisor
There are several factors that make this case successful. 1. The size and shape of the canines are ideal
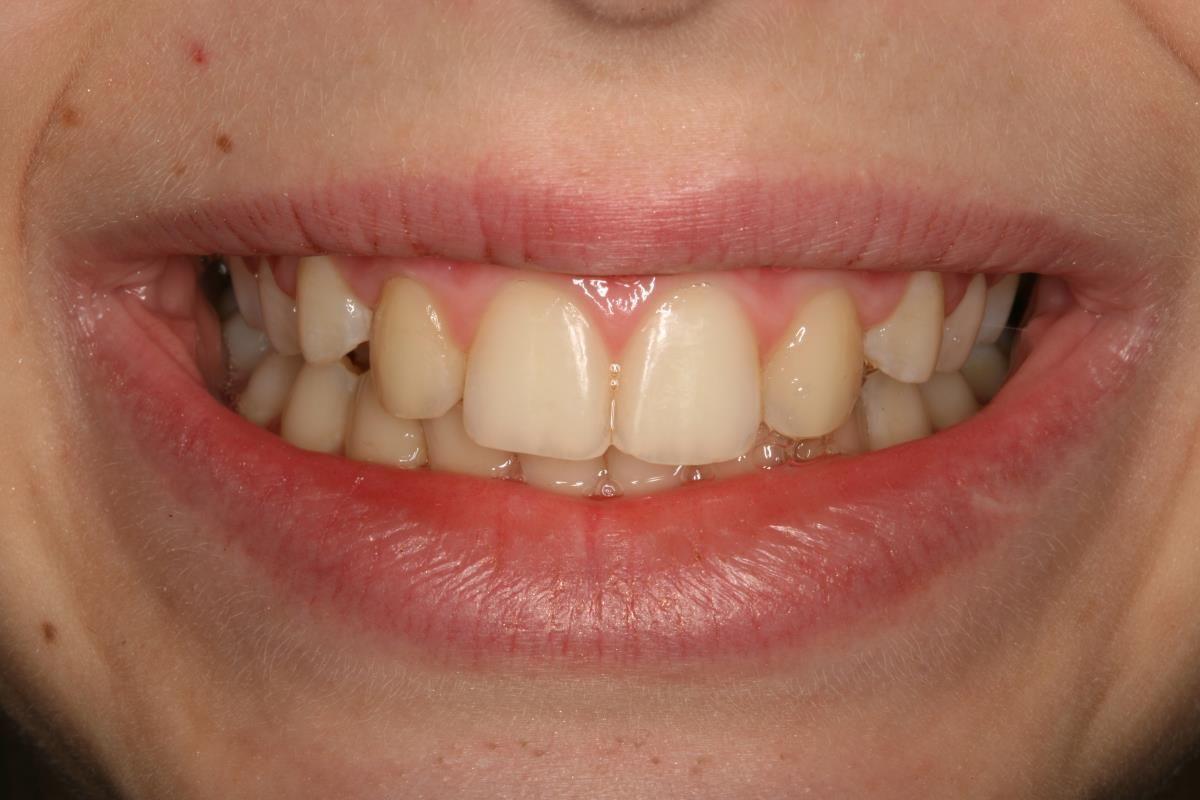
If the canines are of normal size and shape, or if they are larger than normal, it may not be possible to reduce the canines enough to create normally shaped lateral incisors.
2. Maxillary central incisors are of normal size and shape.
It is common with congenitally missing lateral incisors (or peg laterals) for the maxillary central incisors to be more narrow than normal (8.5 mm mesial-distal). If the maxillary central incisors are more narrow than normal, then it is imperative that the lateral incisors (or the canine restored teeth) not to be too wide, otherwise the normal central incisor/lateral incisor relationship will be challenged, creating improper tooth proportions, and ultimately ‘tension’ in the esthetics of the smile.
3. The orthodontist set the case up perfectly
Notice the gingival margin position of the maxillary first bicuspids. The orthodontist intruded the bicuspids so that the gingival margins are apical to the canines that are in the lateral incisor position. This is absolutely a critical issue when the orthodontist sets up the case. It is paramount that the dental team considers the relationship of the lips, gingival margin heights, and tooth placement and form when positioning the teeth.
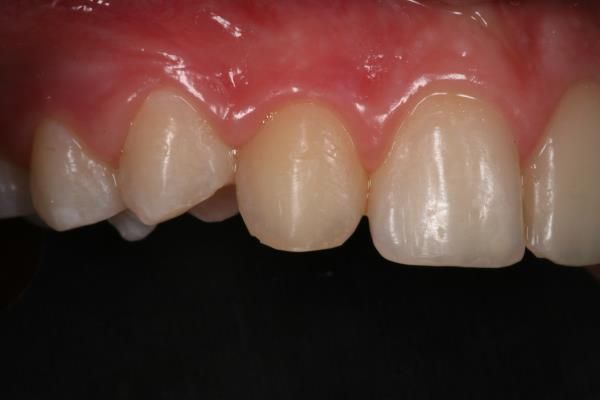
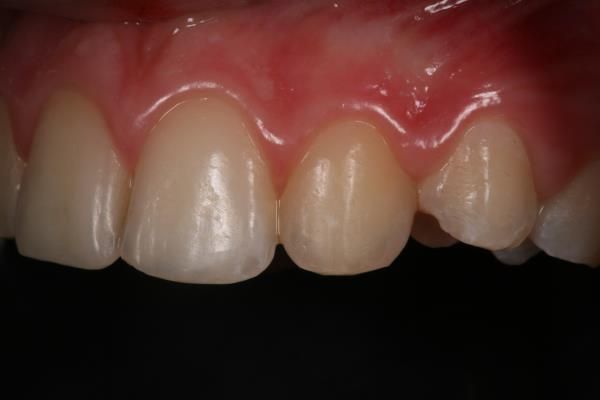
When I am treating adolescent patients like Lizi, I believe that minimal tooth preparation is essential. I find that direct resin bonding is the ideal restorative material for most of these cases as I can have minimal tooth removal while creating ideally contoured final restorations. The treatment for Lizi consisted of utilizing a nano-filled composite for the lingual and incisal shelf, opaquers to block out the transition zones, tints to add color and intensives, and finally, microfill composites for the surface to provide the optimal surface texture and luster.
Dennis Hartlieb, DDS, AAACD
DOT Founder
Join 3,000+ dentists who get monthly restorative dentistry tips
Share this page
Latest from our blog

Our vision is to provide online continuing education workshops and mentorship that are comprehensive for dentists learning at all career levels. DOT is developed for dentists that love to learn online.
CONNECT
Materials Included
Light Brown tints, Enamelize, Unfilled Resin Flexidiscs, Flexibuffs 1/2", #1 artist’s brush, Silicone Polishing Points, IPC Off Angle Short Titanium Coated Composite Instrument
Materials Needed, not Included
- Loupes
Follow along
You are Registered
We’re excited to have you join us! You’ll receive email reminders at with the link to join this event.
If you have any questions in the meantime, feel free to reach out to us at dot@dothandson.com—we’re here to help!
Day 1 (8 - 4 pm CST)
-
Erosion and wear – the why and the how
-
Adding length to teeth – when is it safe
-
Opening VDO to compensate for lost tooth structure – where to begin
-
Records visit and key points you need to understand before you start
-
The smile – the 7 strategic points to consider when evaluating the smile
-
Anterior tooth shape, morphology
-
Clinical case review
-
Upper Putty matrix construction
-
Build lingual incisal wall with putty matrix #6 - #11/ Upper anteriors
-
Full contour build-up #6, #7, #8, #9, #10, #11, shape and polish/ Upper anteriors
Day 2 (8 - 2 pm CST)
-
Who – which patients are candidates
-
Why – explaining to patients the value of the prototype
-
How – step-by-step techniques to maximize predictability, efficiency and success
-
Getting to Yes: conversations with patients about esthetic and reconstructive dentistry
-
The ‘Smile Preview’ – techniques to show the possibilities
-
Lower Putty matrix construction
-
Build lingual incisal wall with putty matrix #22 - #27 / lower anteriors
-
Build-up #22 - #27, shape and polish / lower anteriors
-
Build-up lower occlusal posteriors
-
Demonstration of Smile Preview